Time for a strip down on the Bim
Forum rules
Please can you post items for sale or wanted in the correct For Sale section. Items / bikes for sale here will be removed without warning. Reasons for this are in the FAQ. Thanks
Please can you post items for sale or wanted in the correct For Sale section. Items / bikes for sale here will be removed without warning. Reasons for this are in the FAQ. Thanks
-
laminator

- NWAA Supporter

- Posts: 220
- Joined: Wed Jan 26, 2011 7:51 pm
- Bike owned: 2tk,NC30, YB7
- Location: Midlands
Re: Time for a strip down on the Bim
j/k, as if by magic...
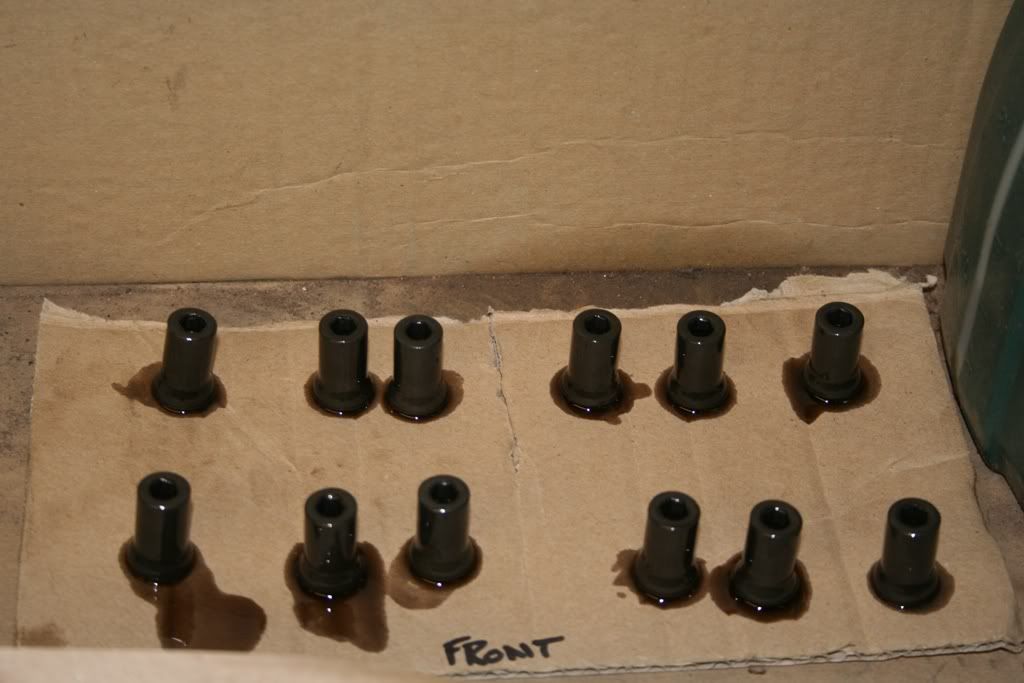
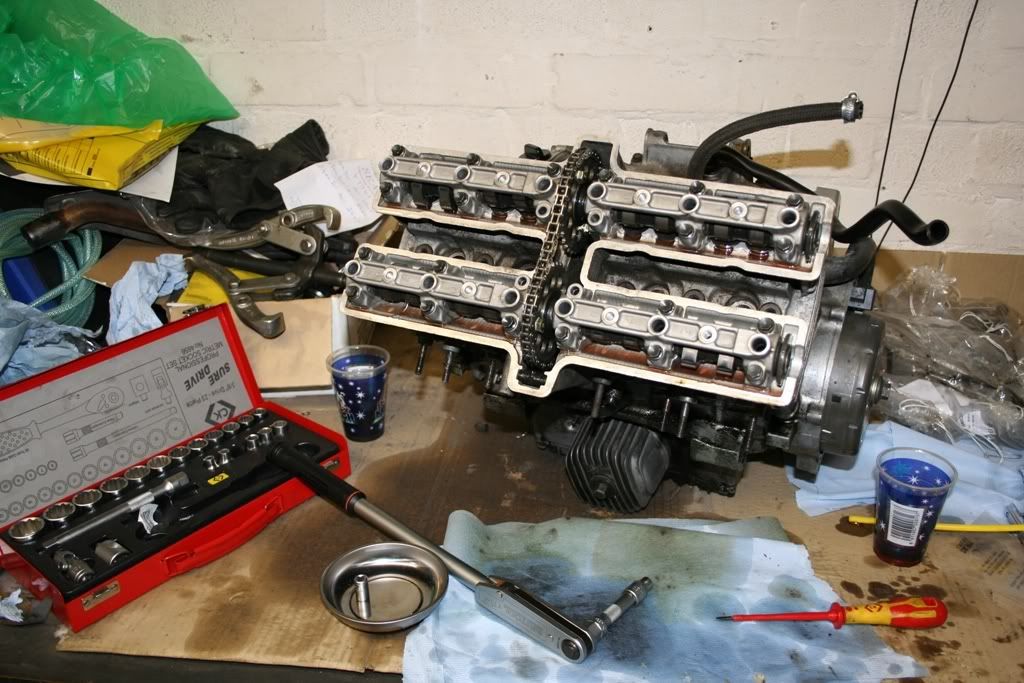
Placed all the nuts in the correct order on some card.
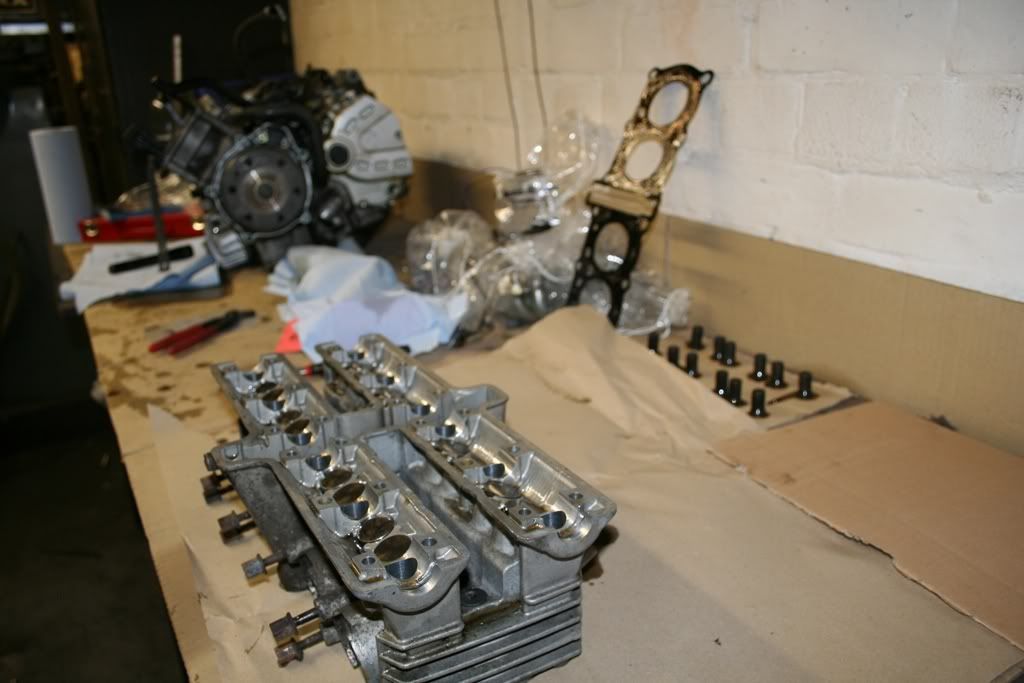
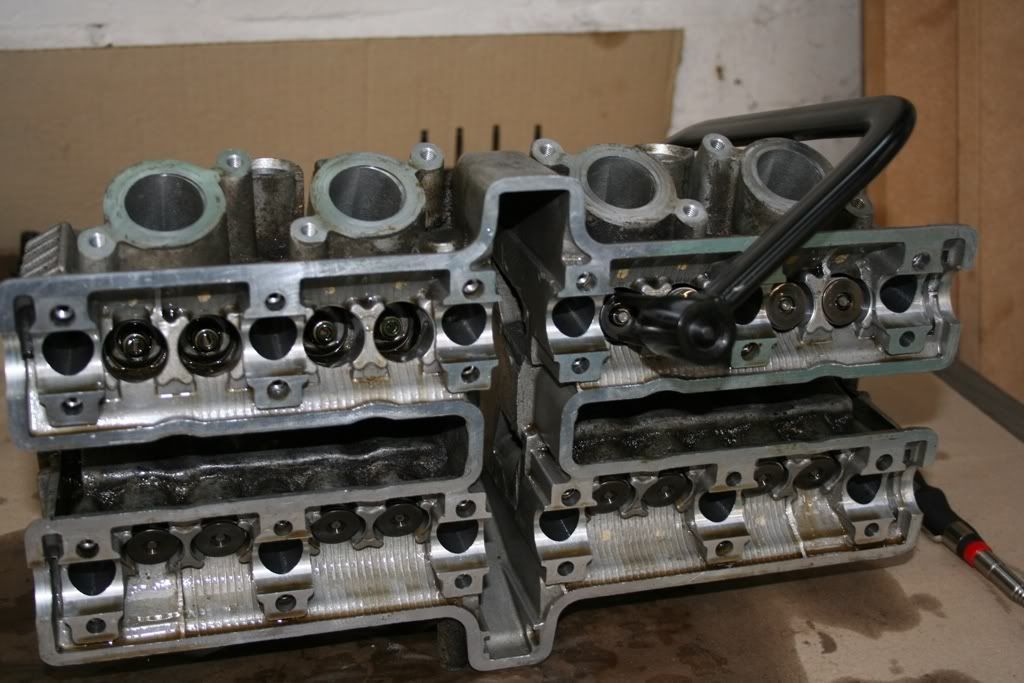
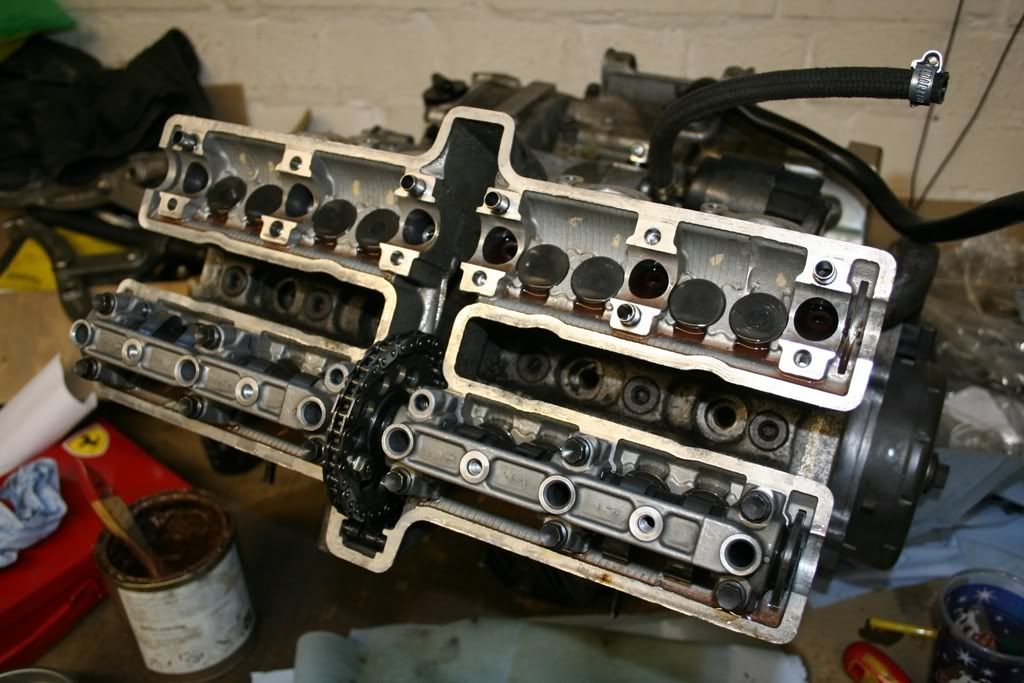
Finally got the head off.
I've kept the old gasket to match up to the new one to confirm it is the correct replacement.
I started removing the lifters and valve pads (as they are called in the manual) with a magnet. This lifted both out at the same time. Again, placed them in the correct order on some card.
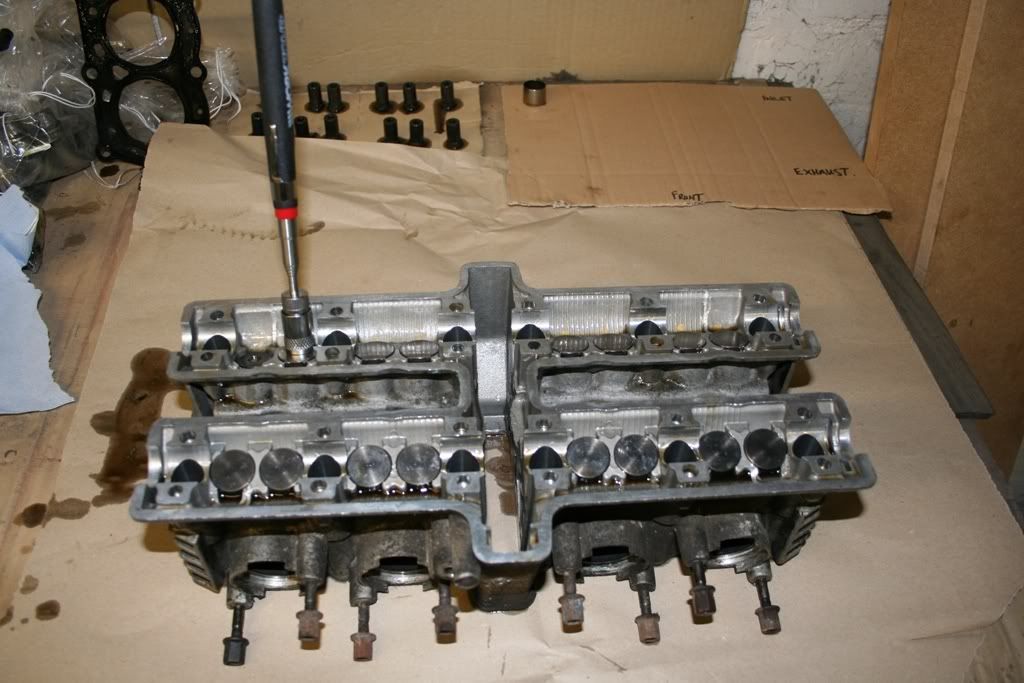
All the lifters removed.

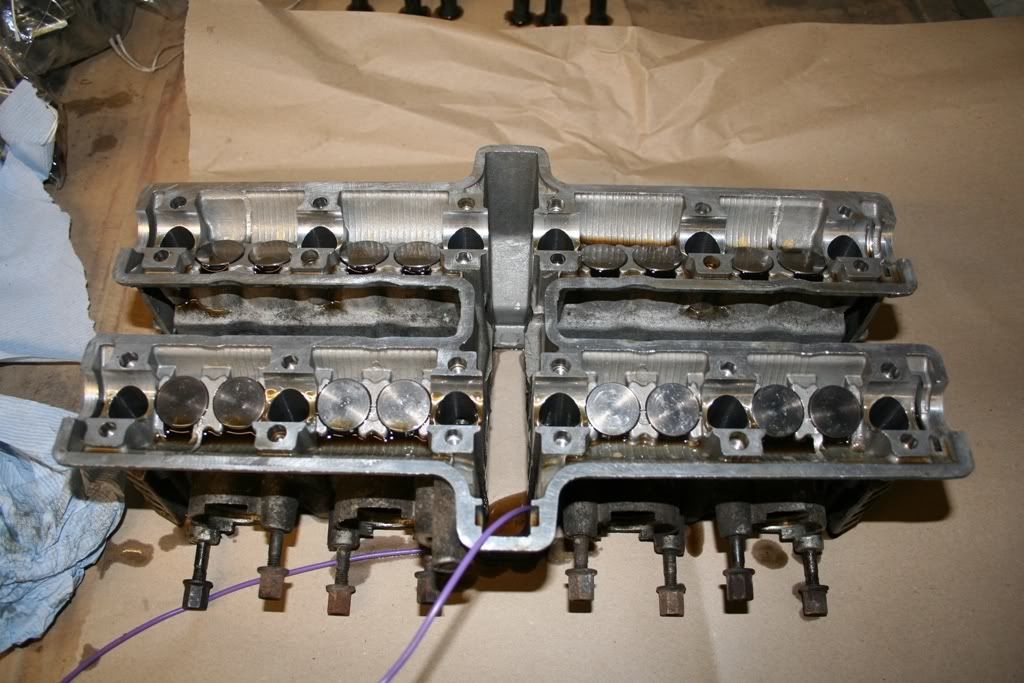
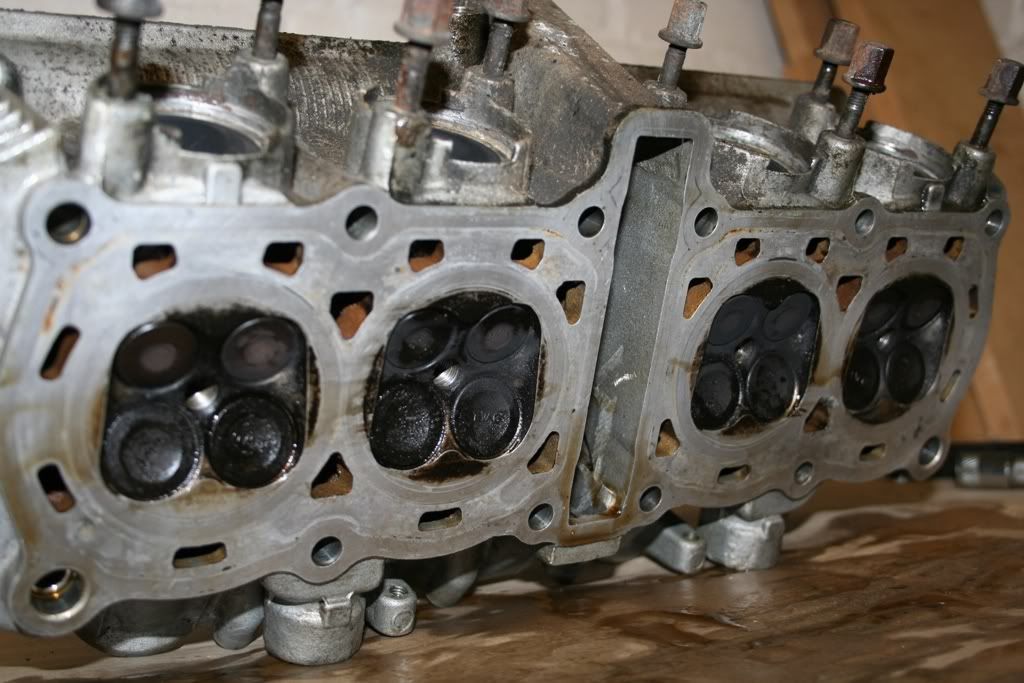
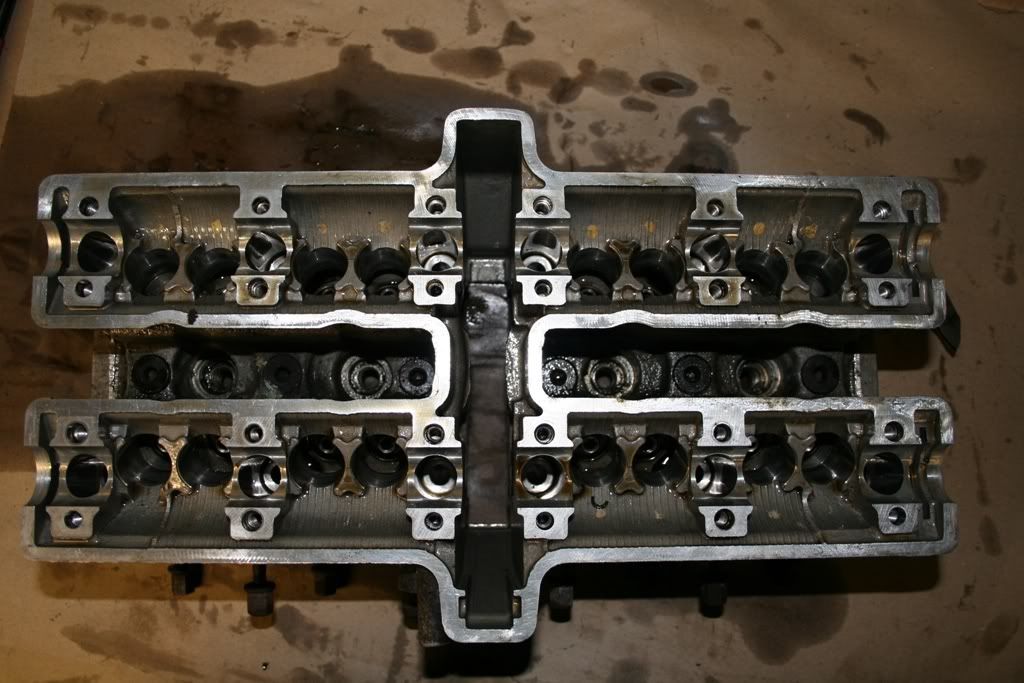
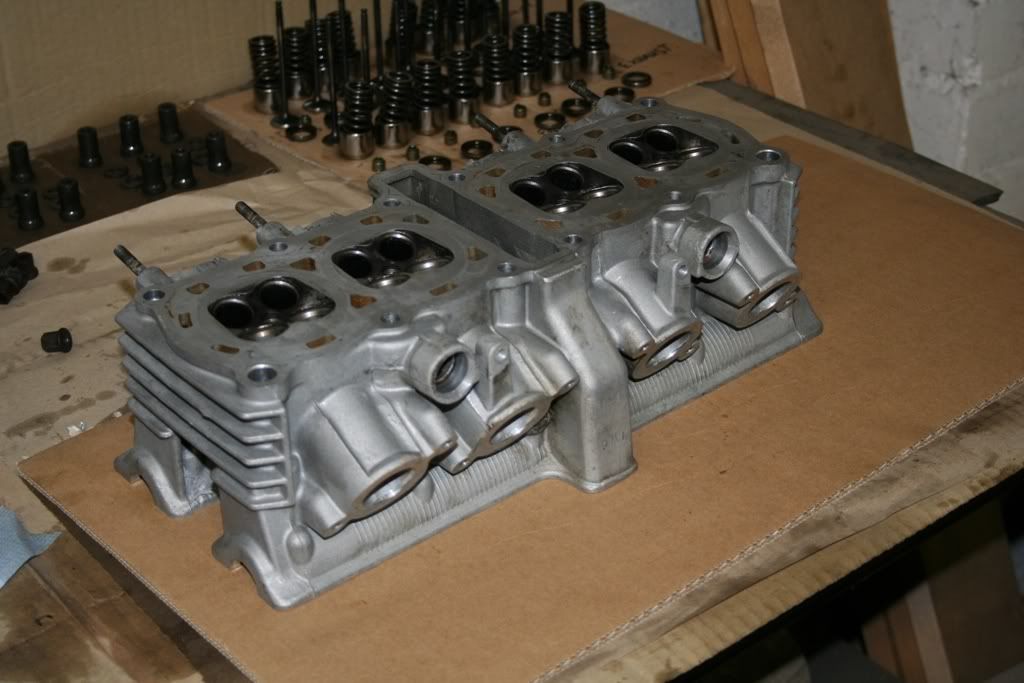
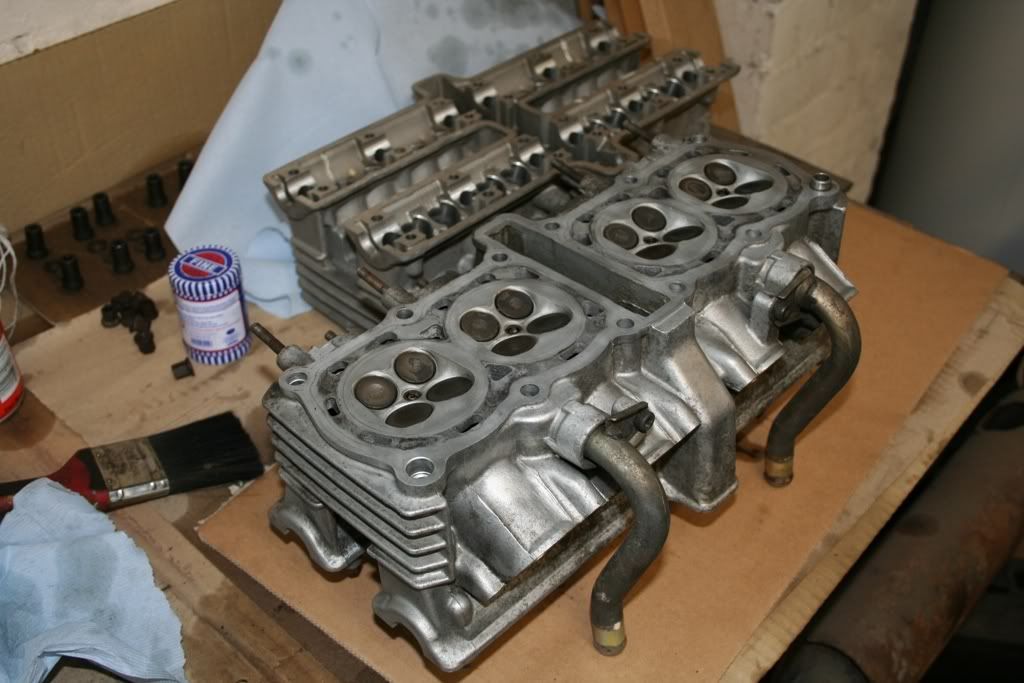
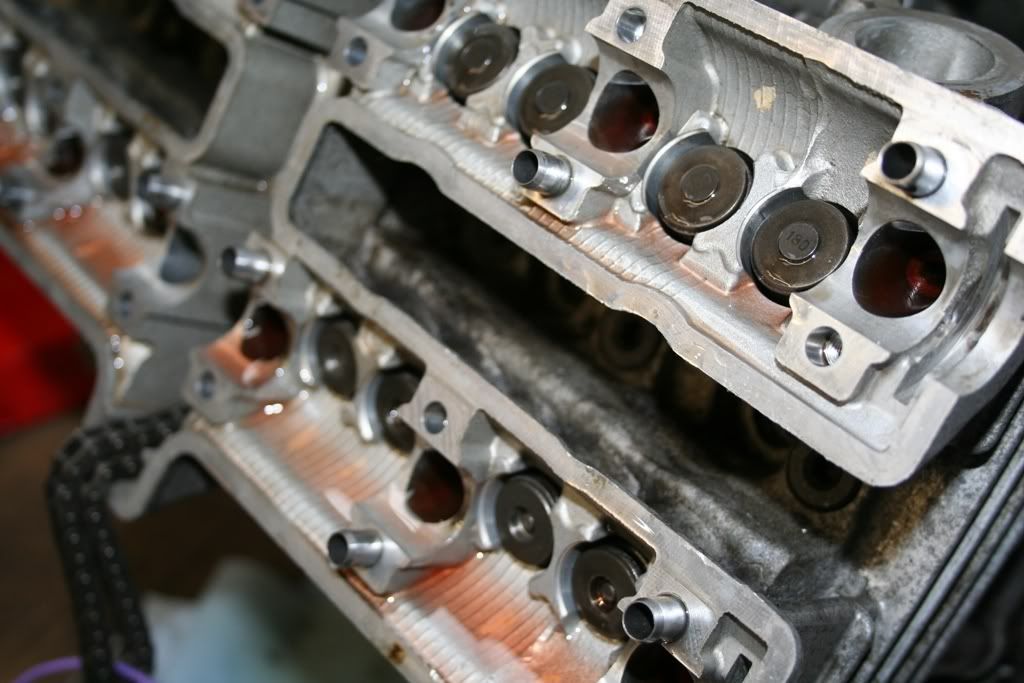
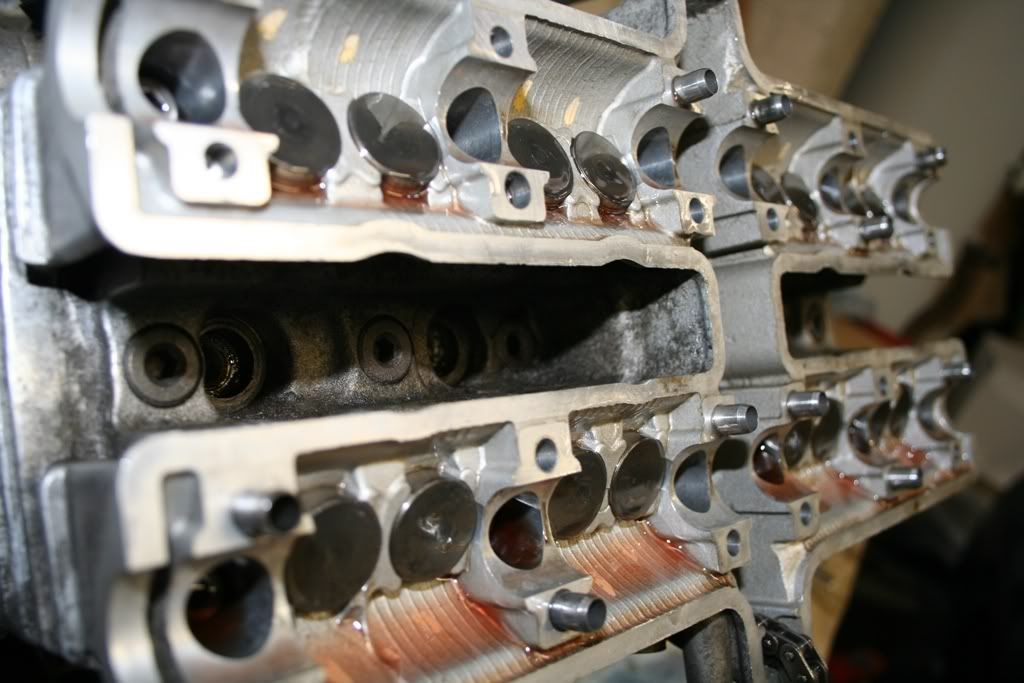
I then turned the head over to have a look. No damage to valves and looks like it just needs a clean.
Checked the bore for wear.
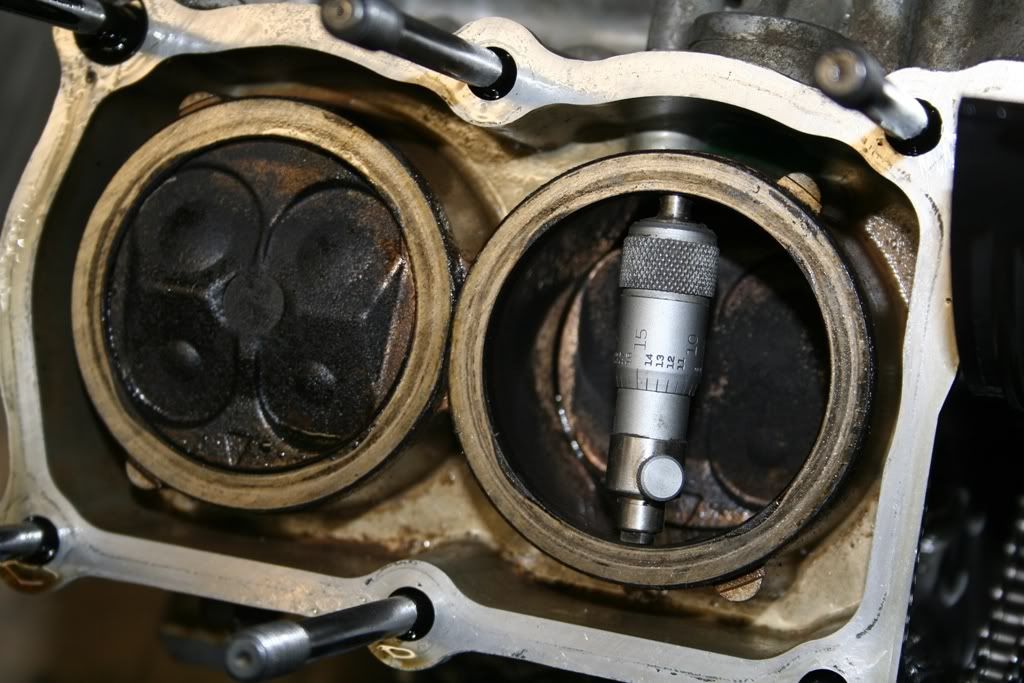
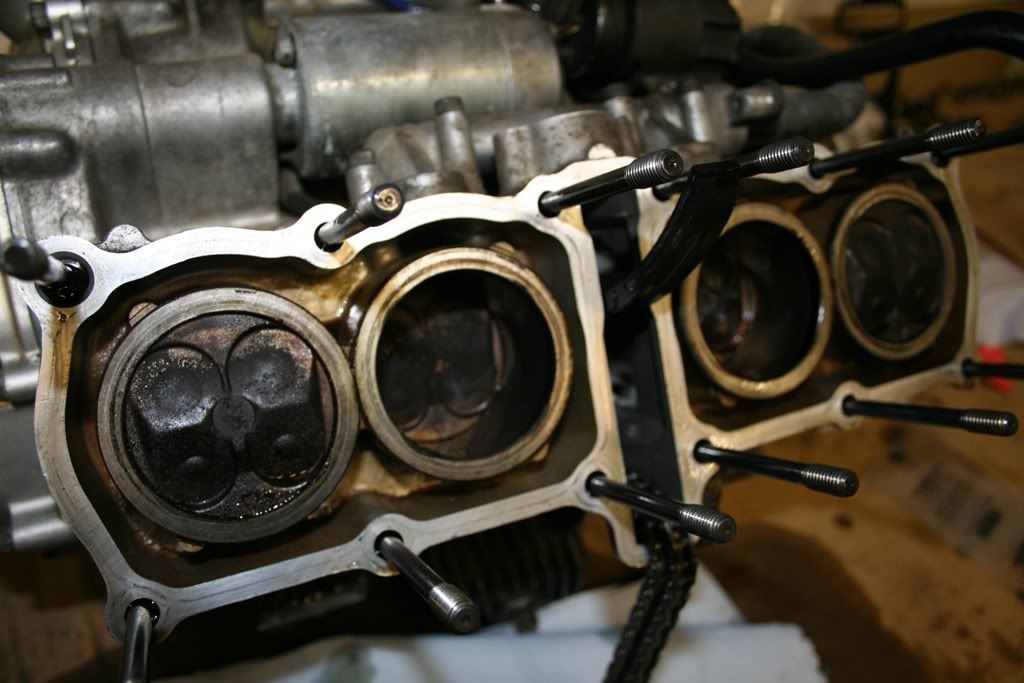
The block and pistons, again look OK to me.
That really was it for the night. I'd got to get a valve compressor then I can actually have a good look at what's happening.
Placed all the nuts in the correct order on some card.
Finally got the head off.
I've kept the old gasket to match up to the new one to confirm it is the correct replacement.
I started removing the lifters and valve pads (as they are called in the manual) with a magnet. This lifted both out at the same time. Again, placed them in the correct order on some card.
All the lifters removed.
I then turned the head over to have a look. No damage to valves and looks like it just needs a clean.
Checked the bore for wear.
The block and pistons, again look OK to me.
That really was it for the night. I'd got to get a valve compressor then I can actually have a good look at what's happening.
-
laminator
- NWAA Supporter
- Posts: 220
- Joined: Wed Jan 26, 2011 7:51 pm
- Bike owned: 2tk,NC30, YB7
- Location: Midlands
Re: Time for a strip down on the Bim
New valve compressor, lapping tool, feeler gauges, and paste. I got two second hand Britool torque wrenches (3/8" & 1/2"), they're off getting calibrated by a mate.

Tool in action. I mean the valve compressor, not me!
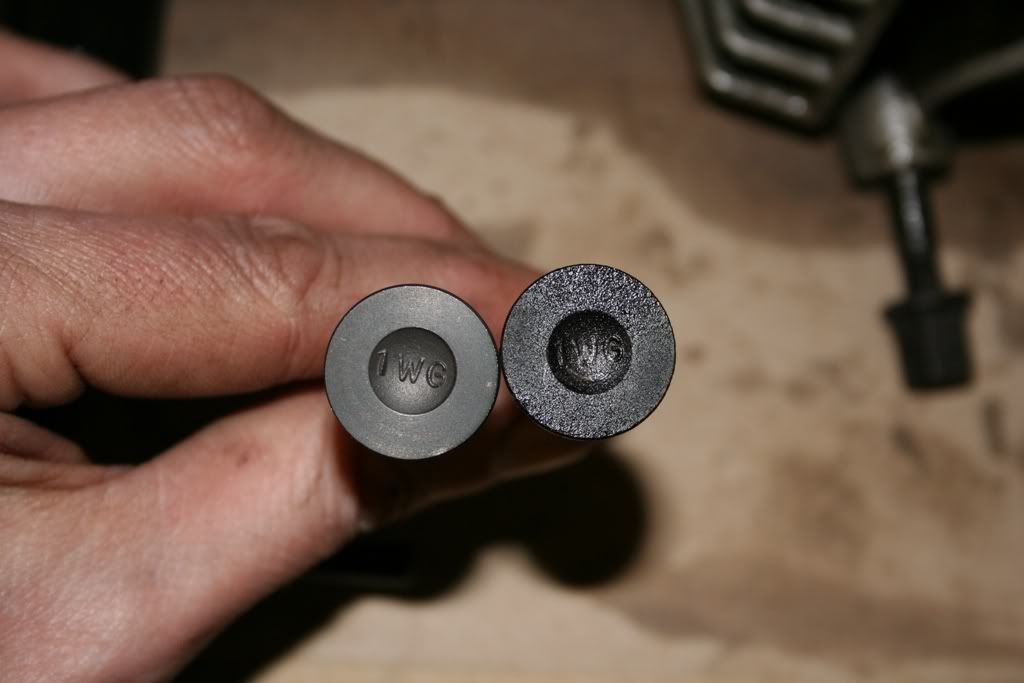
First of the suspect valves, will there be a seal under here?
Drum roll......
No................
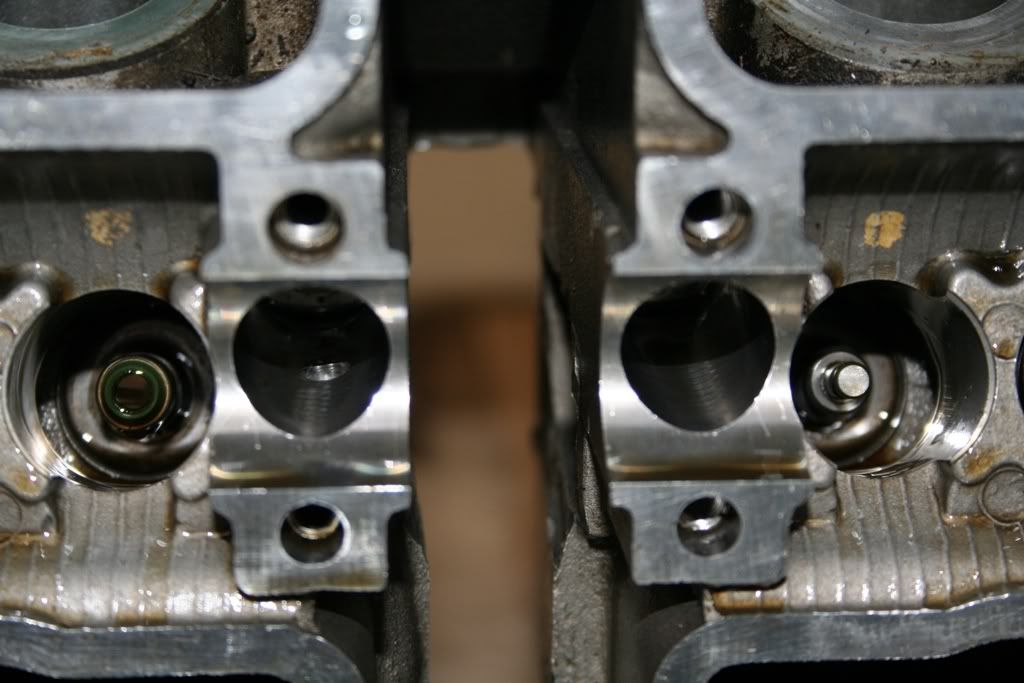
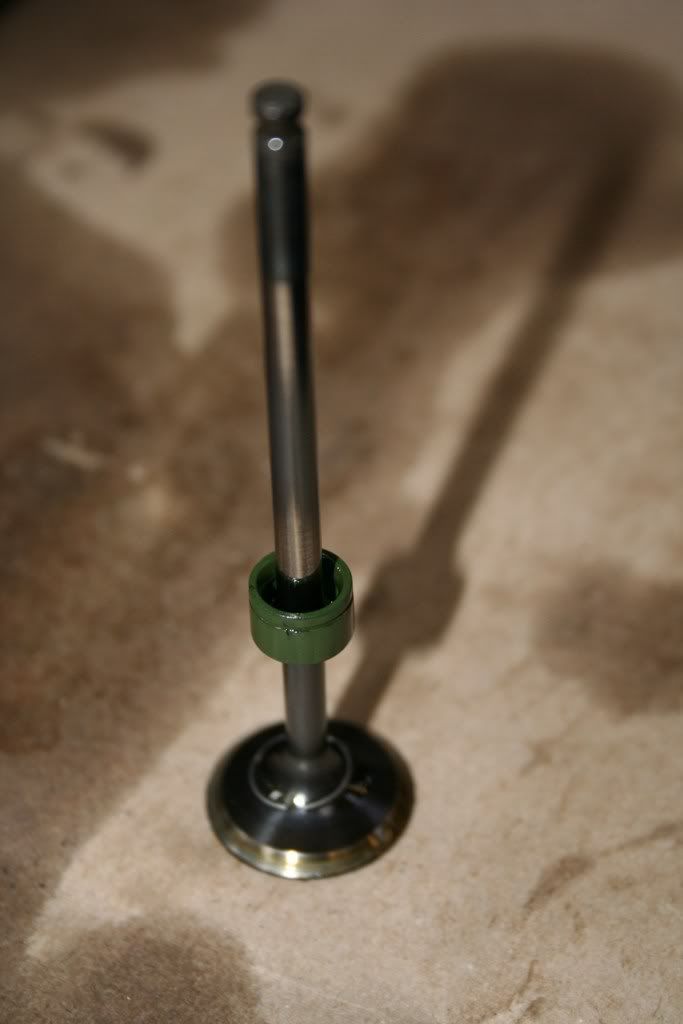
The valve out! Seal was put under the valve guide, retaining clip had come off aswell. Imagine this at 14k revs!
All the valves out. The two suspect valves still have the seals on them, and you can see the retaining clip. Also, notice the rogue seal on the top right of the photo! (it's bigger than the others). I'd started cleaning the valves as can be seen on the two exhaust valves on the left hand side.
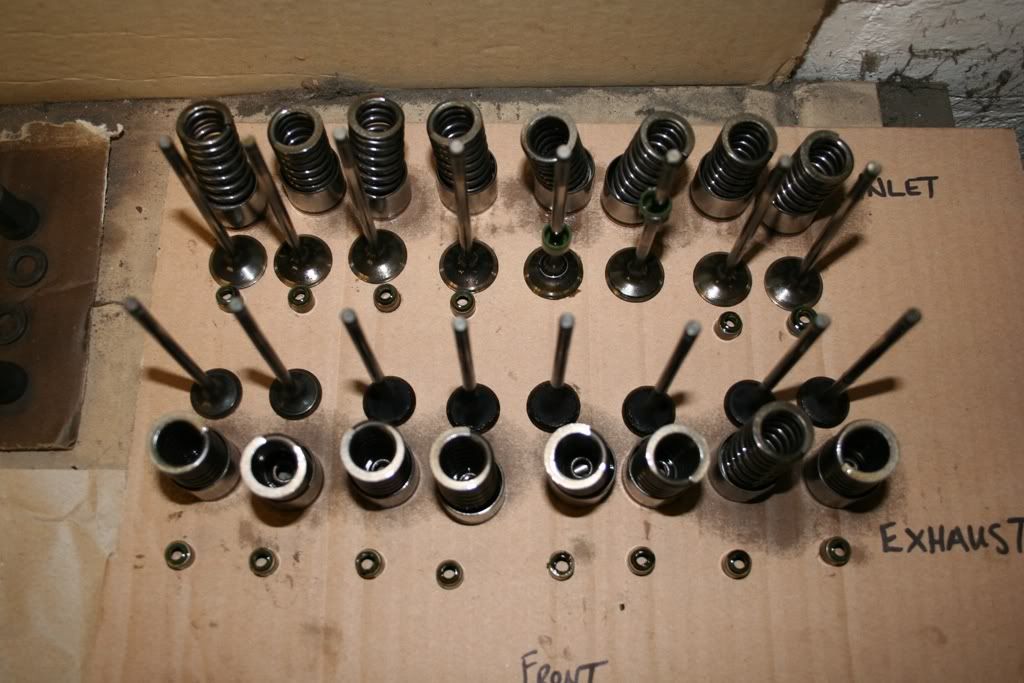
I used a piece of rubber tube, slipped over the end of the valve, to hold it in a drill without damaging it with the chuck. I then spun the valve and cleaned the crud off it, repeated for all the valves. Then into the blasting cabinet to clean the end, with glass bead.
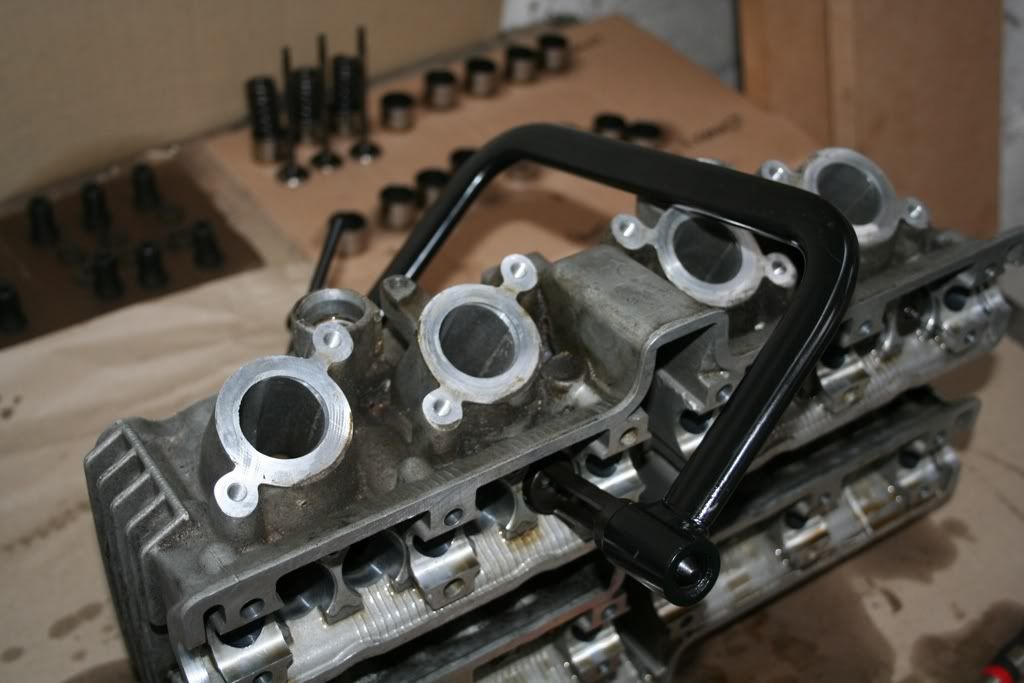
The head is now stripped ready for a polish (in places), valve lapping and then a good clean.
Tool in action. I mean the valve compressor, not me!
First of the suspect valves, will there be a seal under here?
Drum roll......
No................
The valve out! Seal was put under the valve guide, retaining clip had come off aswell. Imagine this at 14k revs!
All the valves out. The two suspect valves still have the seals on them, and you can see the retaining clip. Also, notice the rogue seal on the top right of the photo! (it's bigger than the others). I'd started cleaning the valves as can be seen on the two exhaust valves on the left hand side.
I used a piece of rubber tube, slipped over the end of the valve, to hold it in a drill without damaging it with the chuck. I then spun the valve and cleaned the crud off it, repeated for all the valves. Then into the blasting cabinet to clean the end, with glass bead.
The head is now stripped ready for a polish (in places), valve lapping and then a good clean.
-
Evilchicken0
- Site Supporter

- Posts: 5374
- Joined: Tue Apr 29, 2008 8:59 pm
- Bike owned: Bimota SB6 Yamaha FZR 3TJ x2
- Location: Lundin Taan
Re: Time for a strip down on the Bim
You've been busy then 
-
laminator
- NWAA Supporter
- Posts: 220
- Joined: Wed Jan 26, 2011 7:51 pm
- Bike owned: 2tk,NC30, YB7
- Location: Midlands
Re: Time for a strip down on the Bim
This threads going to look like nobody wants to talk to me, as all the posts are mine, except one (*two) from EC. It'll slow down a lot when I get up to date. To get this far took me a while.
As the weather was so nice last Sunday I took the YB9 out for a spin. Instead of working on the YB7.
I've never been a fan of the pretend carbon indicators and I'd bought some replacements I decided to stick them on while I was at the workshop.
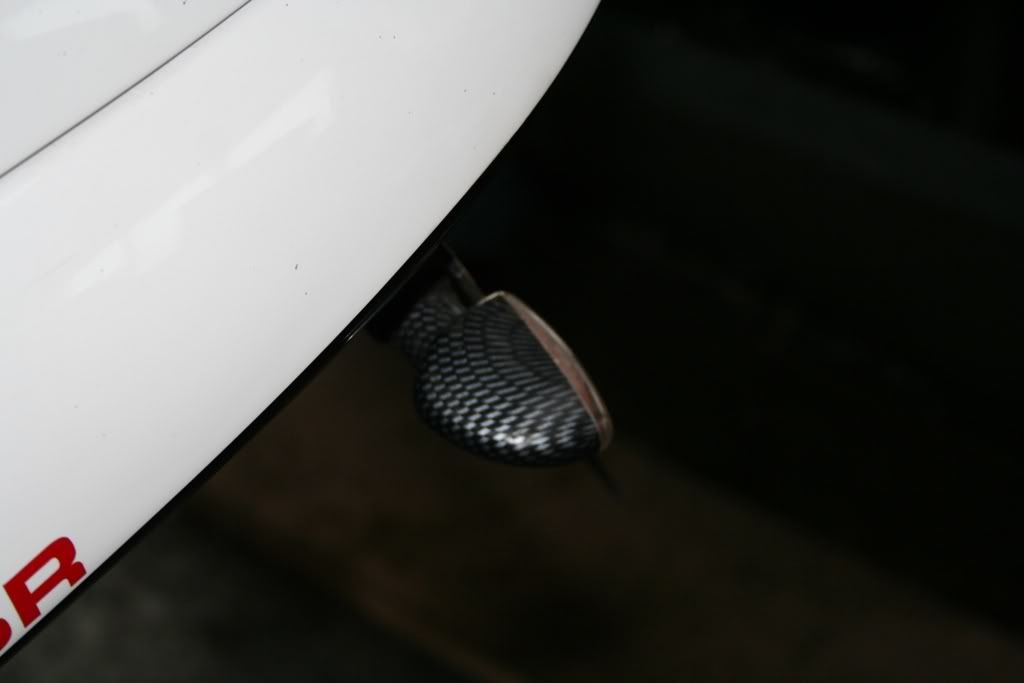
I've been trying to find some carbon replacements, in the same style, but can't find any. I got some plain black for now. I think they look much better.
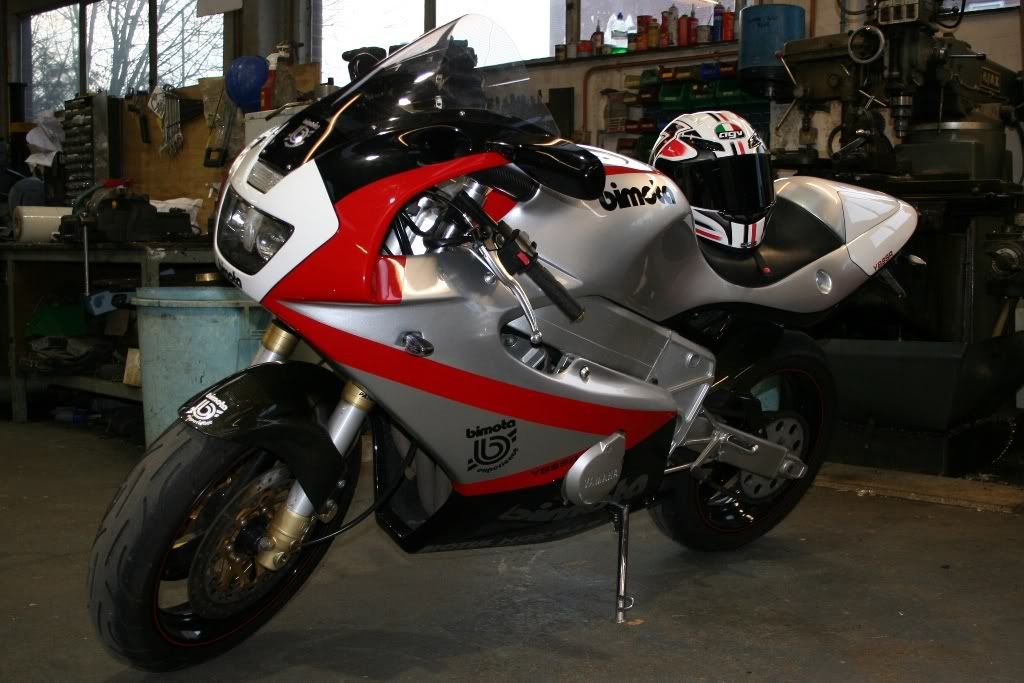
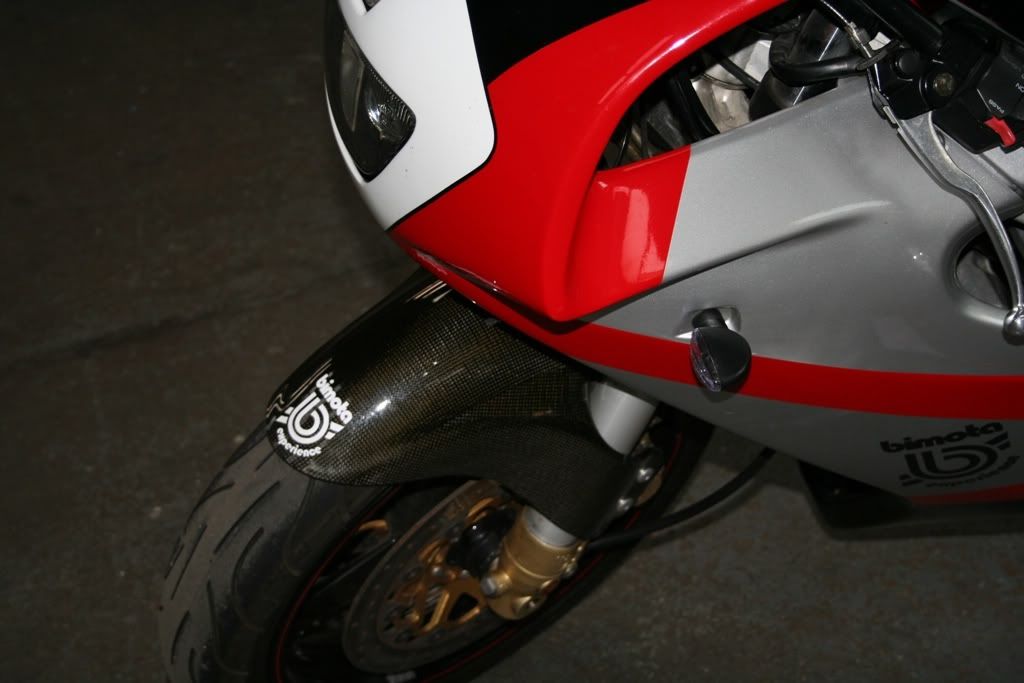
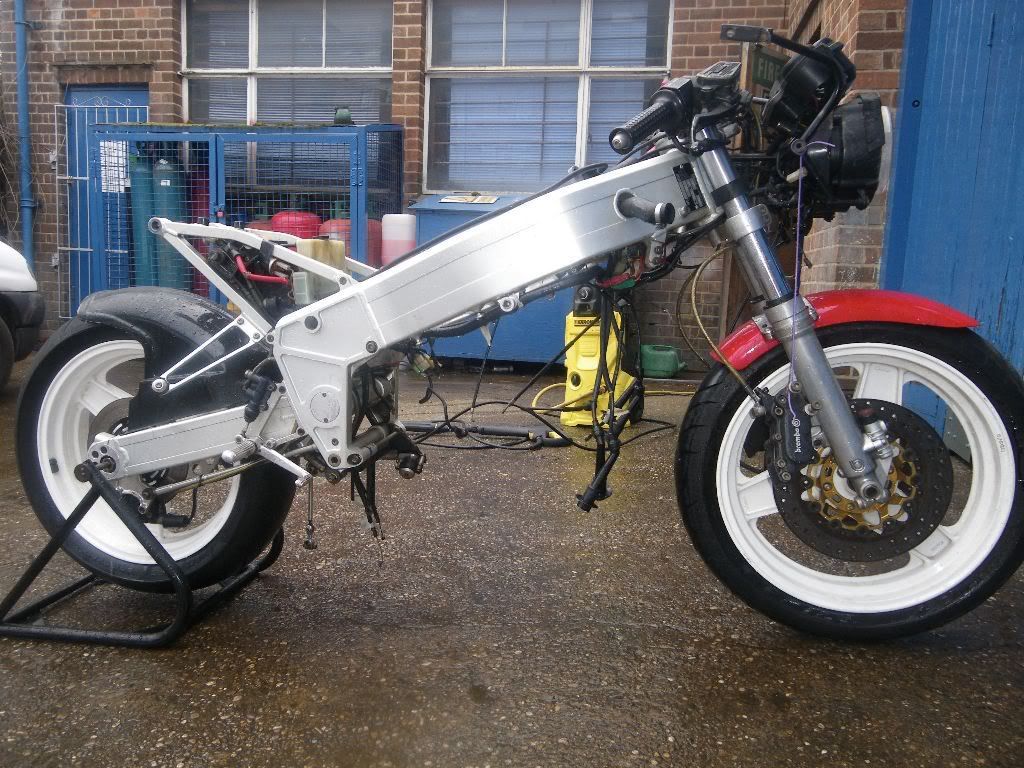
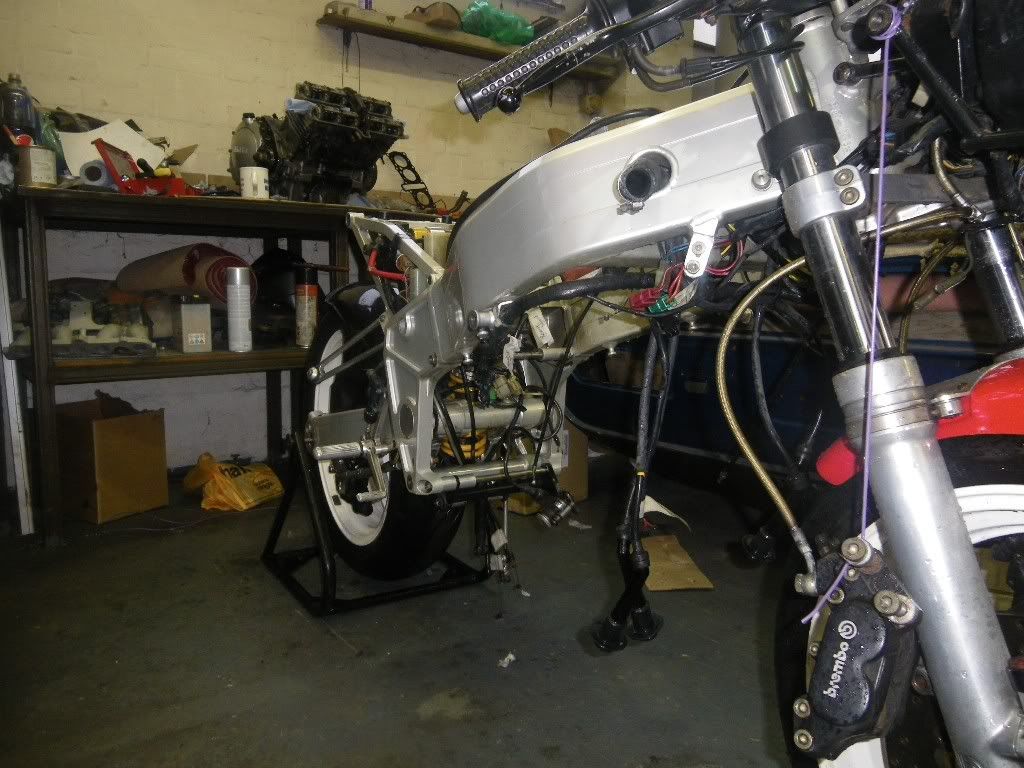
The poorly YB7 looks unhappy peering out from under its blanket. (I did tidy the wires up behind the number plate on the YB9 before I finished)
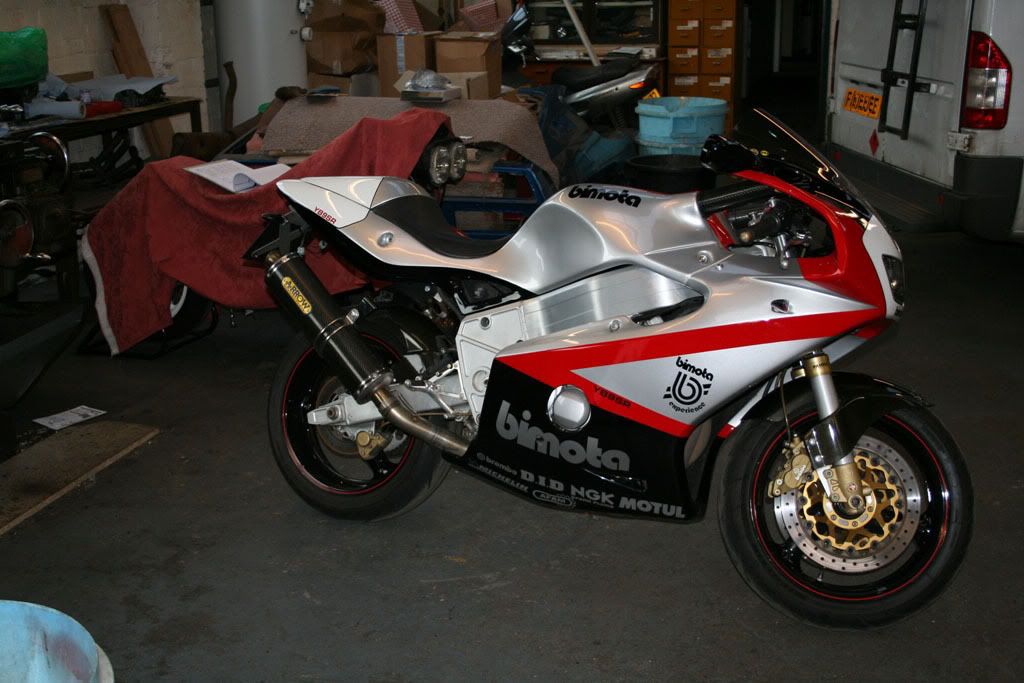
As the weather was so nice last Sunday I took the YB9 out for a spin. Instead of working on the YB7.
I've never been a fan of the pretend carbon indicators and I'd bought some replacements I decided to stick them on while I was at the workshop.
I've been trying to find some carbon replacements, in the same style, but can't find any. I got some plain black for now. I think they look much better.
The poorly YB7 looks unhappy peering out from under its blanket. (I did tidy the wires up behind the number plate on the YB9 before I finished)
-
laminator
- NWAA Supporter
- Posts: 220
- Joined: Wed Jan 26, 2011 7:51 pm
- Bike owned: 2tk,NC30, YB7
- Location: Midlands
Re: Time for a strip down on the Bim
I think you've seen the future. This was the original headEvilchicken0 wrote:You've been busy then
-
laminator
- NWAA Supporter
- Posts: 220
- Joined: Wed Jan 26, 2011 7:51 pm
- Bike owned: 2tk,NC30, YB7
- Location: Midlands
Re: Time for a strip down on the Bim
Back on the YB7 - Gaskets, new valve stem seals, etc arrived. I cleaned the head up a bit and started looking at lapping the valves.
After looking closely at some of the valves I decided I'd prefer to get some new ones, there was quite a large step in some of them. I decided to look for a head to fit while I spend some time on the original one. Thanks to EvilChicken I managed to find a 2TK head for sale with valves, etc. I checked the new valves were seated correctly and the rest of the head, all's good.
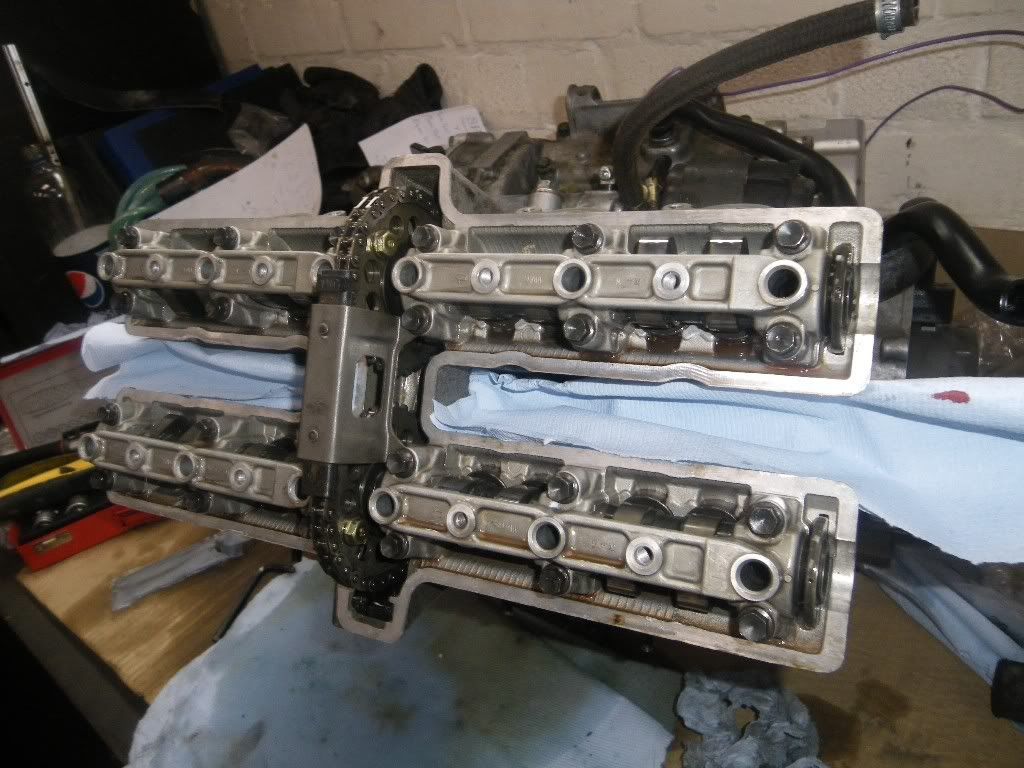
New head gasket fitted and head bolted on. I started installing the shims and put 180's on all the valves as a starting point.
All the buckets in place.
Exhaust cam installed
Both cams in.
I measured the valve clearances, then removed the cams to replace with the correct shims. Most were within tolerance only a couple needed changing. I then put the cams back in, checked alignment, checked clearances again and replaced the cam chain guide.
After looking closely at some of the valves I decided I'd prefer to get some new ones, there was quite a large step in some of them. I decided to look for a head to fit while I spend some time on the original one. Thanks to EvilChicken I managed to find a 2TK head for sale with valves, etc. I checked the new valves were seated correctly and the rest of the head, all's good.
New head gasket fitted and head bolted on. I started installing the shims and put 180's on all the valves as a starting point.
All the buckets in place.
Exhaust cam installed
Both cams in.
I measured the valve clearances, then removed the cams to replace with the correct shims. Most were within tolerance only a couple needed changing. I then put the cams back in, checked alignment, checked clearances again and replaced the cam chain guide.
-
laminator
- NWAA Supporter
- Posts: 220
- Joined: Wed Jan 26, 2011 7:51 pm
- Bike owned: 2tk,NC30, YB7
- Location: Midlands
Re: Time for a strip down on the Bim
Now we're up to date. I went down today to carry on.
Mmmm, it's dirty down here.
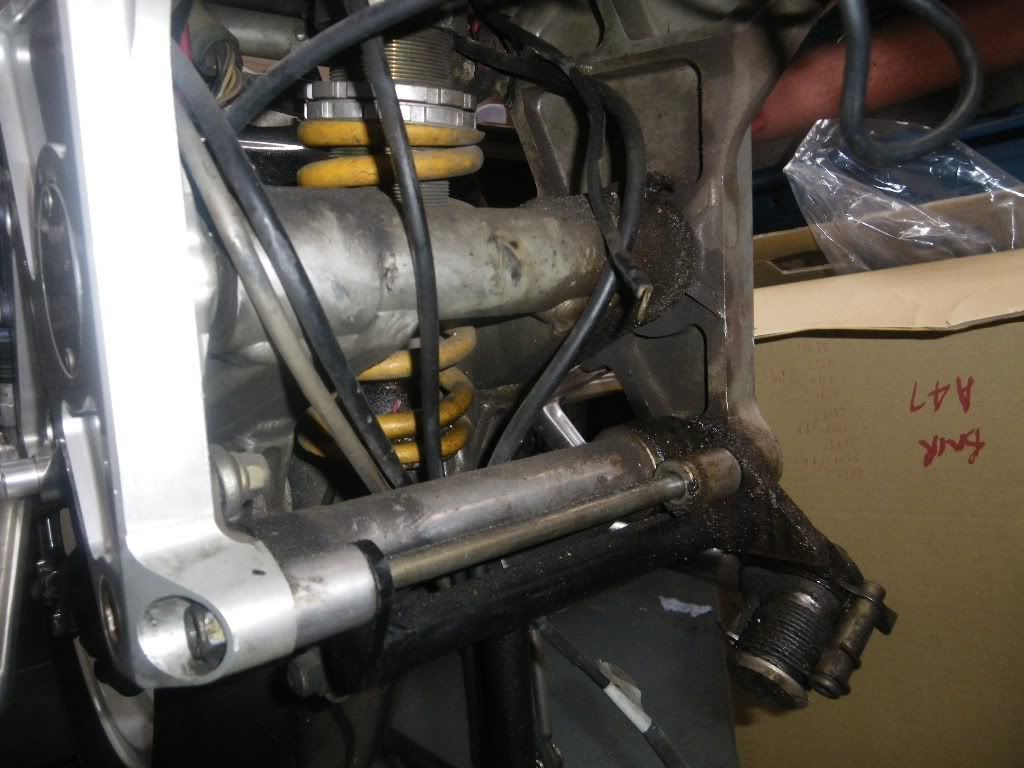

I took it out for a bit of a clean. I gave it a degrease and wash, it's getting there.
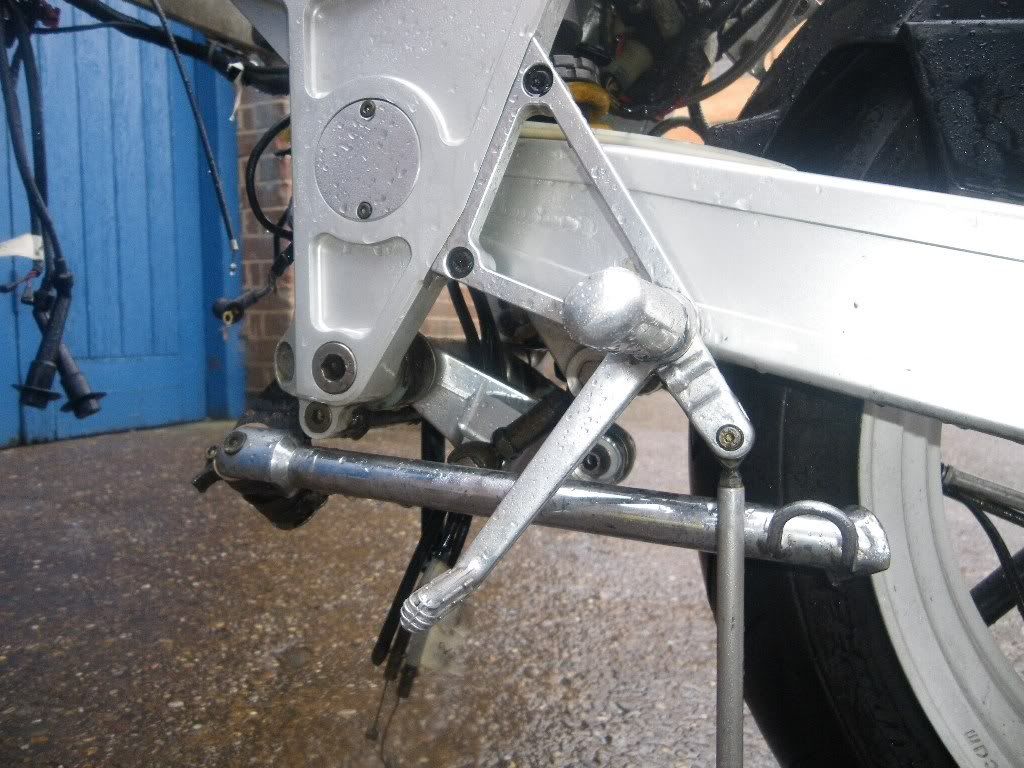
First clean done.
Starting to look better.
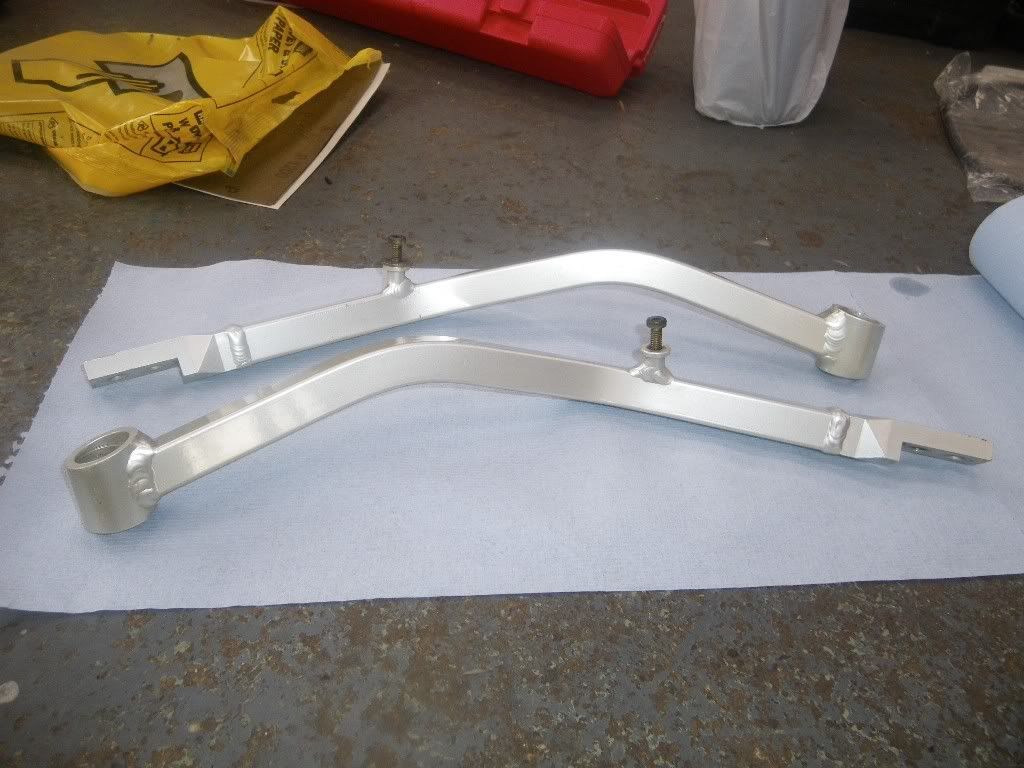
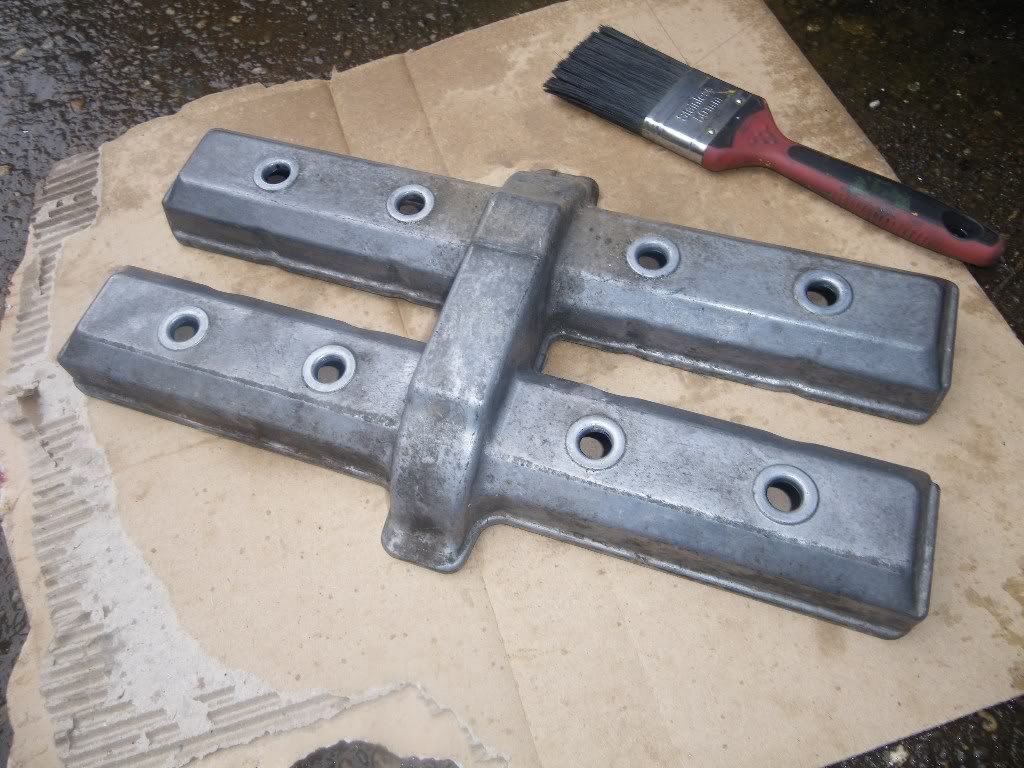
Front engine supports cleaned up
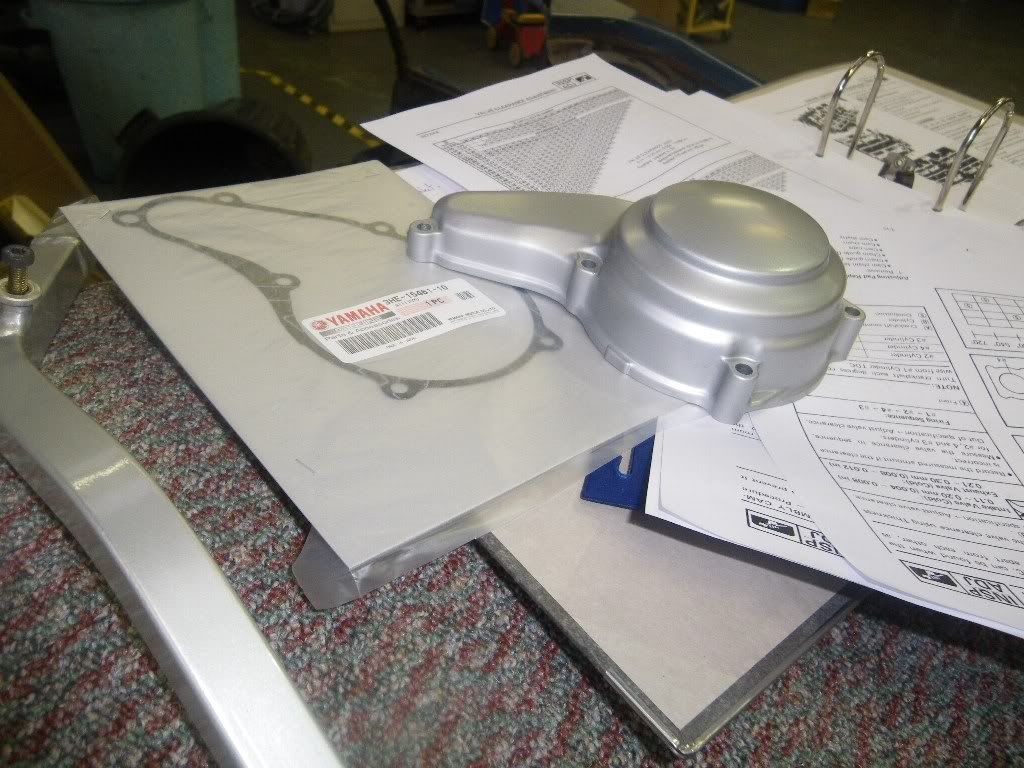
More new gaskets.
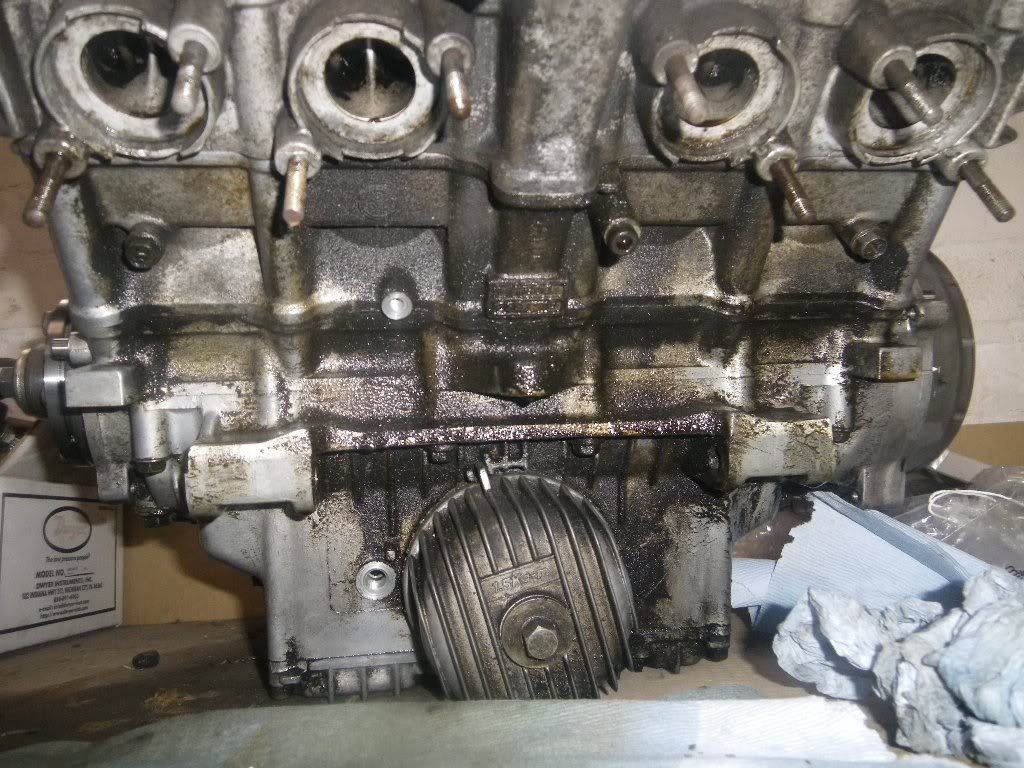
Front of the engines still very dirty. I want to get the engine sealed with all the oil pipes before giving it a proper clean.
First clean of the cam cover
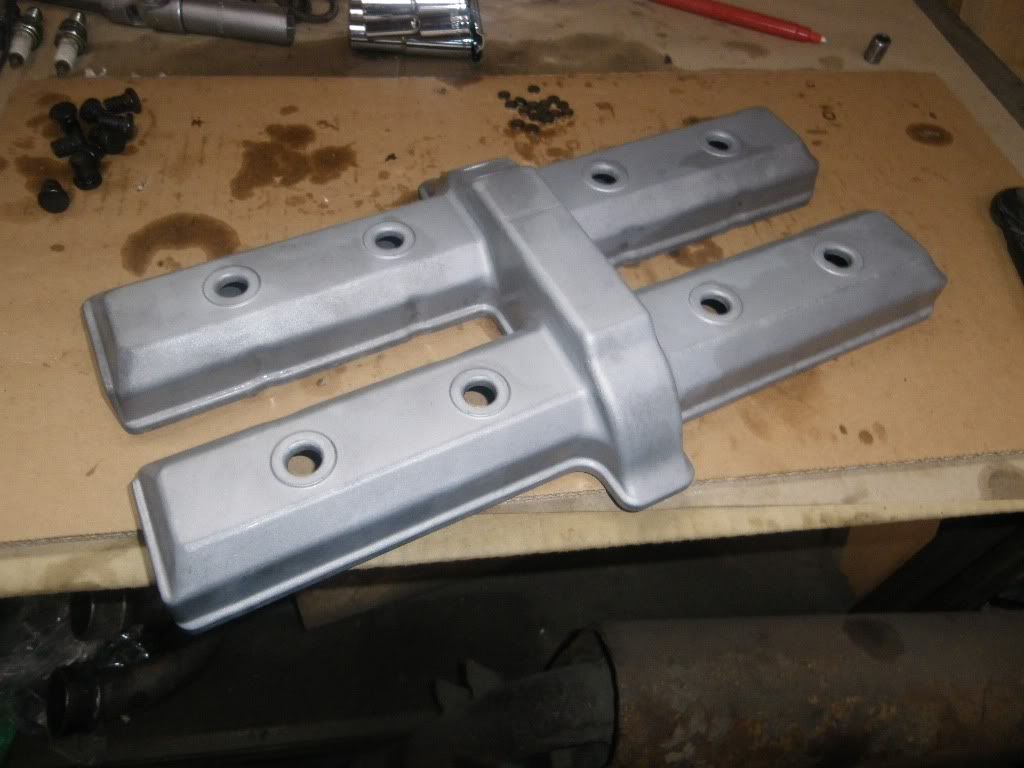
Bead blasted the cover.
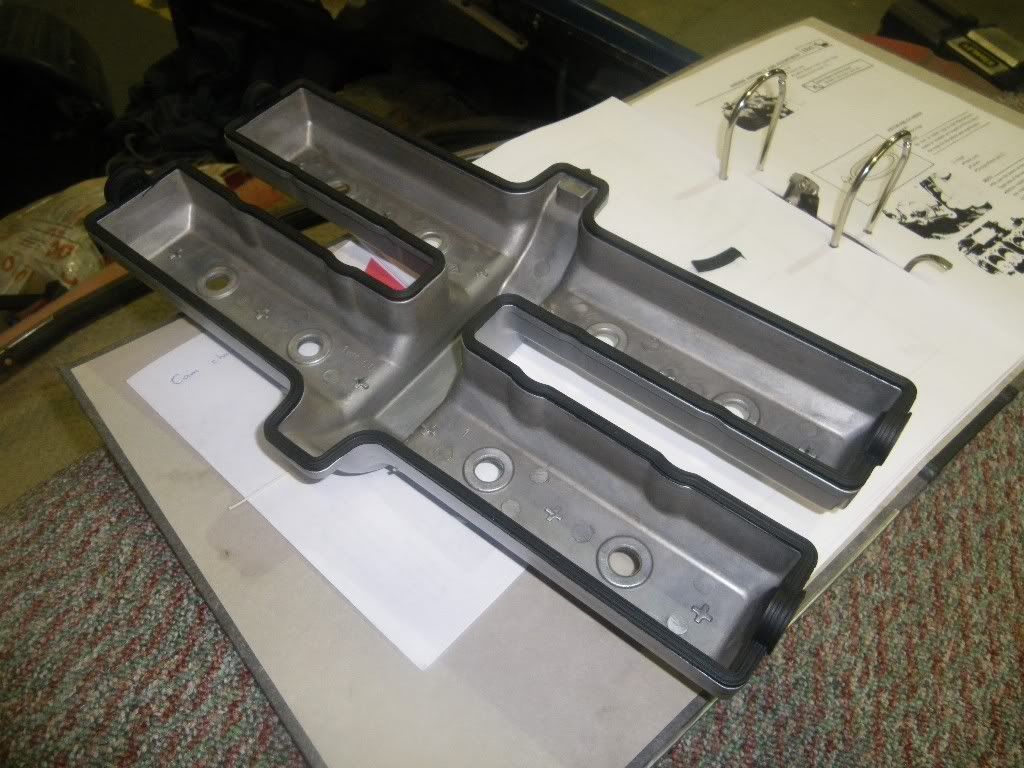
New cam cover gasket going in.
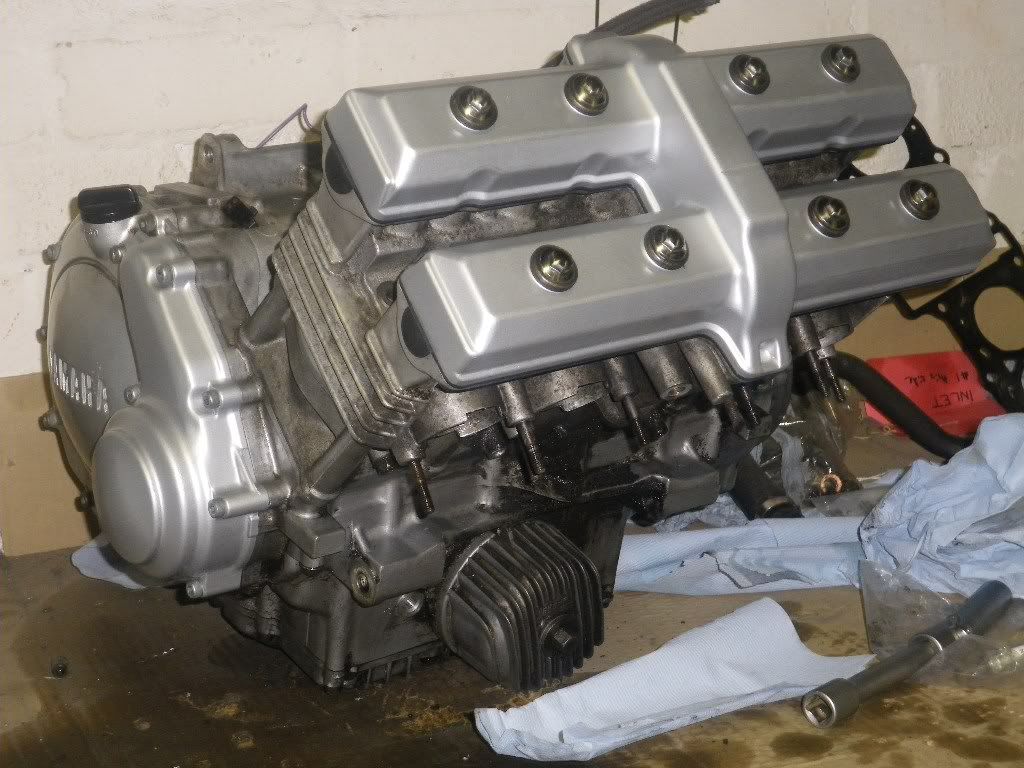
Cam cover and side cover on. I started to give the front of the engine a wipe, just to see how it will clean up.
Mmmm, it's dirty down here.
I took it out for a bit of a clean. I gave it a degrease and wash, it's getting there.
First clean done.
Starting to look better.
Front engine supports cleaned up
More new gaskets.
Front of the engines still very dirty. I want to get the engine sealed with all the oil pipes before giving it a proper clean.
First clean of the cam cover
Bead blasted the cover.
New cam cover gasket going in.
Cam cover and side cover on. I started to give the front of the engine a wipe, just to see how it will clean up.
-
Evilchicken0
- Site Supporter
- Posts: 5374
- Joined: Tue Apr 29, 2008 8:59 pm
- Bike owned: Bimota SB6 Yamaha FZR 3TJ x2
- Location: Lundin Taan
Re: Time for a strip down on the Bim
It looks like the motorbike equivalent of Yodalaminator wrote:
-
CRM

- Admin NWAA

- Posts: 2973
- Joined: Sat Apr 05, 2008 2:06 pm
- Location: NorthWest
- Contact:
Re: Time for a strip down on the Bim
Good skills sir, and glad you found and identified the problem.
it's kinda nice when you find stuff like this, and it affirms your bond with a bike. had similar with my RVF runt i built from bits from a couple of donor bikes and of course the original "triggers broom" = my 916
it's kinda nice when you find stuff like this, and it affirms your bond with a bike. had similar with my RVF runt i built from bits from a couple of donor bikes and of course the original "triggers broom" = my 916
Insert Signature Here
-
CMSMJ1

- Moderators

- Posts: 7166
- Joined: Thu May 01, 2008 9:42 am
- Bike owned: NC30-No9
- Location: Chesterfield, United Kingdom
Re: Time for a strip down on the Bim
Aye, quality thread. I like to see bikes being cared for. This is a nice old motor..looks good in the nude 
IMPERATOR REX ANGLORUM
The V4 is the law..
NC30 - No9 - my old mate
The V4 is the law..
NC30 - No9 - my old mate