Carb Sync DIY tool(turned into NC35 carb syncing discussion)
Forum rules
Please can you post items for sale or wanted in the correct For Sale section. Items / bikes for sale here will be removed without warning. Reasons for this are in the FAQ. Thanks
Please can you post items for sale or wanted in the correct For Sale section. Items / bikes for sale here will be removed without warning. Reasons for this are in the FAQ. Thanks
-
Neosophist
- Moderators

- Posts: 8172
- Joined: Fri Jul 04, 2008 1:01 pm
- Bike owned: CBR954
Re: VFR750 Carb Sync DIY tool
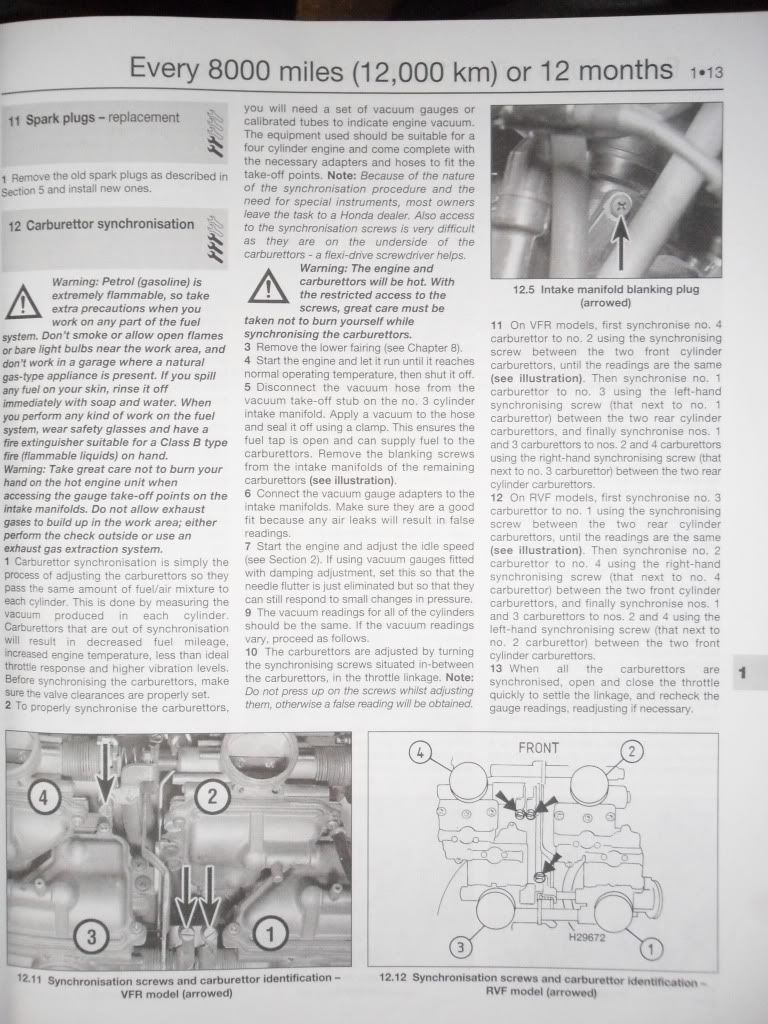
vfrs dont work like this.
the screws dont adjust 1 and 2 and 3 and 4 then the pair like they do on an inline four.
You can see which carb is fixed becuase it doensn't have an adjust screw, this is usually carb number 2 (front left)
just turn the screws on the other carbs until all the bars line up
the screws dont adjust 1 and 2 and 3 and 4 then the pair like they do on an inline four.
You can see which carb is fixed becuase it doensn't have an adjust screw, this is usually carb number 2 (front left)
just turn the screws on the other carbs until all the bars line up
xivlia wrote:i dont go fast on this bike so really do not need a rear brake.. /
vic-vtrvfr wrote:Ask xivlia for help, he's tackled just about every problem u could think of...
-
brmoore
- Settled in member
- Posts: 136
- Joined: Sun Jan 16, 2011 6:29 pm
- Bike owned: 125/250/400/600/1000
- Location: North West, UK
Re: VFR750 Carb Sync DIY tool
Yea the haynes manual shows that but for the RVF they just have a rough drawing, looks like carb 1 or 3 is the fixed one?
Here's Haynes Manual;
Here's Haynes Manual;
-
Neosophist
- Moderators
- Posts: 8172
- Joined: Fri Jul 04, 2008 1:01 pm
- Bike owned: CBR954
Re: VFR750 Carb Sync DIY tool
It doesn't matter too much, you can just look, besides. you'll only have 3 screws, turning them will soon show you which carb doesnt move as much when you have you carbs on the balancer..
These 3 screws will still affect the fixed carb to some degree as more suction on the one carb will affect the others. just align all the bars.
These 3 screws will still affect the fixed carb to some degree as more suction on the one carb will affect the others. just align all the bars.
xivlia wrote:i dont go fast on this bike so really do not need a rear brake.. /
vic-vtrvfr wrote:Ask xivlia for help, he's tackled just about every problem u could think of...
-
brmoore
- Settled in member
- Posts: 136
- Joined: Sun Jan 16, 2011 6:29 pm
- Bike owned: 125/250/400/600/1000
- Location: North West, UK
Re: VFR750 Carb Sync DIY tool
I've got some awesome images that might really help any NC35 noobs like myself 
First, side fairing off bike(this is just the right side, I don't have any carb tools so I haven't taken the other side off I'm just looking);
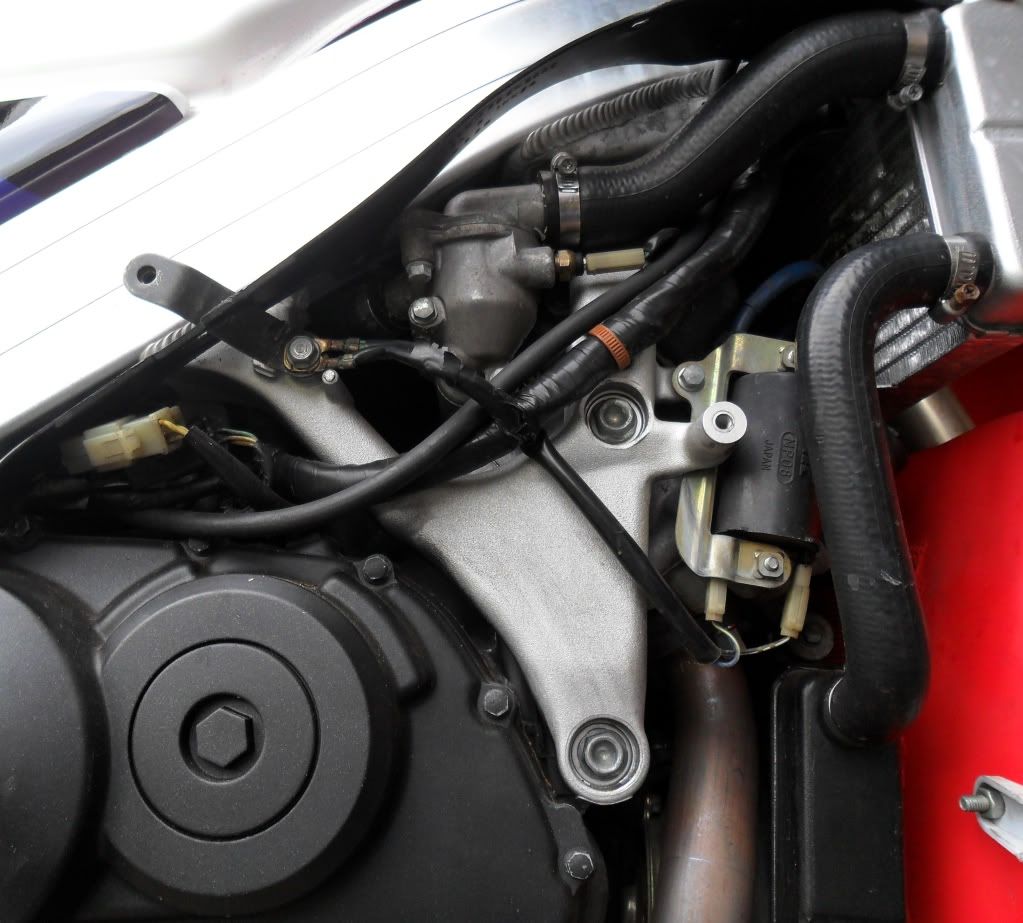
Then focus on this area here, pointed out by my mag light ;
;
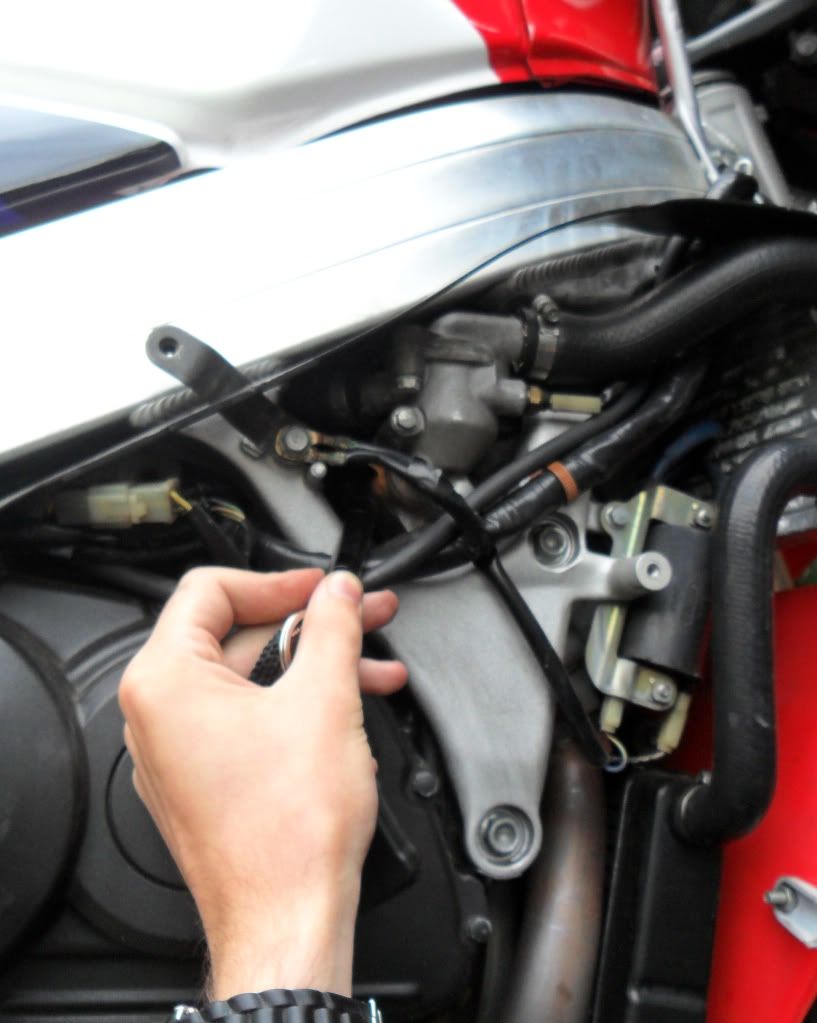
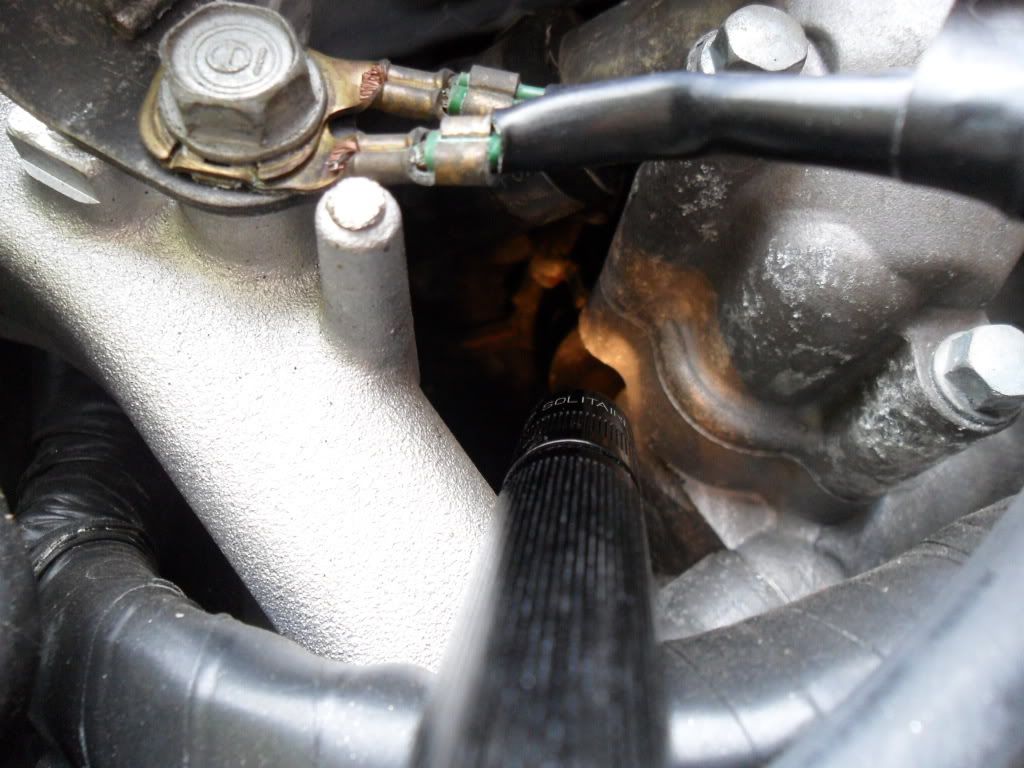
Now we zoom in and the focus has angled upwards, the mag light is point to where the carb adjusting screws are(unmistakable once you know what the feckers look like! );
);
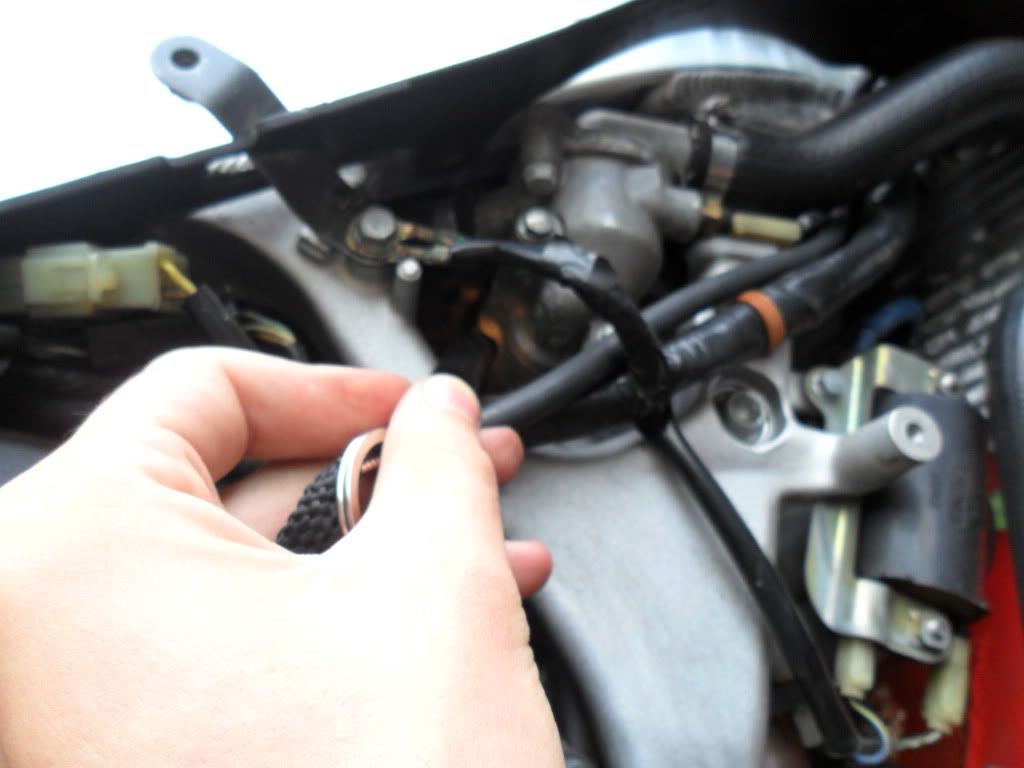
Zoom in a bit more, I'm unsure if I've managed to catch a screw peaking there or not ;
;
Finally if you were able to stick your head in that hole and look up, you will know see one of the screws!!(either for carb 4 or 2, still haven't got my orientation right, also note the screw im talking about is on the VERY LEFT of the image almost cut off, best i could get sorry lol);
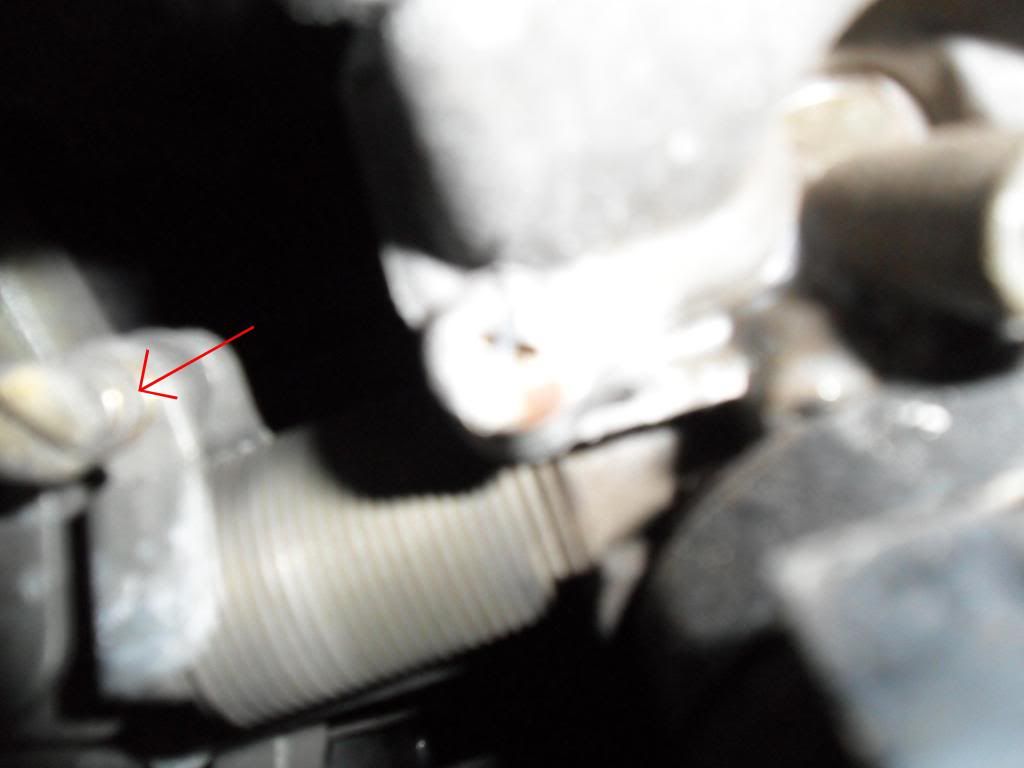
Note: These screws appear to be spring loaded(how I found them apart from all the other bits), and the lone 3rd screw is further back(you can recognise it once you've found the others to compare).
First, side fairing off bike(this is just the right side, I don't have any carb tools so I haven't taken the other side off I'm just looking);
Then focus on this area here, pointed out by my mag light
Now we zoom in and the focus has angled upwards, the mag light is point to where the carb adjusting screws are(unmistakable once you know what the feckers look like!
Zoom in a bit more, I'm unsure if I've managed to catch a screw peaking there or not
Finally if you were able to stick your head in that hole and look up, you will know see one of the screws!!(either for carb 4 or 2, still haven't got my orientation right, also note the screw im talking about is on the VERY LEFT of the image almost cut off, best i could get sorry lol);
Note: These screws appear to be spring loaded(how I found them apart from all the other bits), and the lone 3rd screw is further back(you can recognise it once you've found the others to compare).
-
trademe900
- Settled in member
- Posts: 155
- Joined: Sat Dec 20, 2008 6:20 am
- Bike owned: Everything 90's
- Location: Hamamatsu
Re: Carb Sync DIY tool(turned into NC35 carb syncing discuss
I've done the vacuum gauge method before and fucked about to no end to find results only the same as taking the carbs off quickly and balancing the throttle butterflies with drill bit/feeler gauge.
-
brmoore
- Settled in member
- Posts: 136
- Joined: Sun Jan 16, 2011 6:29 pm
- Bike owned: 125/250/400/600/1000
- Location: North West, UK
Re: Carb Sync DIY tool(turned into NC35 carb syncing discuss
That wouldn't be quicker for me, I've also found out I'd need adapters which I didn't know but im still trying to research what the blanking screws you have to remove look liketrademe900 wrote:I've done the vacuum gauge method before and fucked about to no end to find results only the same as taking the carbs off quickly and balancing the throttle butterflies with drill bit/feeler gauge.
-
Jon

- Site Supporter

- Posts: 165
- Joined: Tue May 20, 2008 2:00 am
- Location: Brisbane
Re: Carb Sync DIY tool(turned into NC35 carb syncing discuss
Hi
The vacuum port screws are in the head, next to the carb mounting rubbers.
If you are ordering a Morgan Carbtune you need the 5mm adaptors for hondas, think it was only a couple $ extra for both sets anyway though.
Good price of kit, easier to look after than a proper mercury manometer.
Cheers
jon
The vacuum port screws are in the head, next to the carb mounting rubbers.
If you are ordering a Morgan Carbtune you need the 5mm adaptors for hondas, think it was only a couple $ extra for both sets anyway though.
Good price of kit, easier to look after than a proper mercury manometer.
Cheers
jon
-
brmoore
- Settled in member
- Posts: 136
- Joined: Sun Jan 16, 2011 6:29 pm
- Bike owned: 125/250/400/600/1000
- Location: North West, UK
Re: Carb Sync DIY tool(turned into NC35 carb syncing discuss
Thanks for the 5mm info was wondering that too, I'm gonna be a cheapo and make a tool like the one on the first post im sure it will make a result thats better than what its at now so no worries, but yea i need those adapters, do you have a picture of the vacuum port screw area, is it close the the adjustment screws, this is sounding like im gonna need some heat resistant gloves with my hands up in this engine area!Jon wrote:Hi
The vacuum port screws are in the head, next to the carb mounting rubbers.
If you are ordering a Morgan Carbtune you need the 5mm adaptors for hondas, think it was only a couple $ extra for both sets anyway though.
Good price of kit, easier to look after than a proper mercury manometer.
Cheers
jon
-
Adrianvh
- Settled in member
- Posts: 3
- Joined: Sun Mar 27, 2016 12:24 am
Re: Carb Sync DIY tool(turned into NC35 carb syncing discuss
as an update to this I found the following helps.
FOR NC35 RVF400 sync the rear carbies 1 and 3 via the rear single adjustment screw. I did this by removing the carbs and adjusting them till they matched. A hassle but about as much of a hassle as the bent screw driver method that's painfully slow.
Once 1 and 3 and synced, refit the carbies and and adjust the screw closest to cyl 4 (front right) so that carbie 2 and 4 are synced. You can do this without removing the carbies by turning the bike off and opening the throttle so the adjustment screws rotate up to a position you can reach with a 7mm spanner from the top.
Keep adjusting in small steps till they balance, then adjust the link between 1 & 3 too 2 & 4. Same deal, turn engine off and rotate throttle till the screw becomes visible from the top.
You will find having a battery charger hooked up while doing this a big help.