I’m an RVF Owner. This is my Story (Warning – LONG)
-
Pete Diggs
- Site Supporter

- Reactions:
- Posts: 52
- Joined: Wed Feb 17, 2010 12:04 am
- Bike owned: NC35, Monster S4R, MG 850T
- Location: Sacramento, Ca
- Contact:
Re: I’m an RVF Owner. This is my Story (Warning – LONG)
Just finished my custom temperfoam seat...check it out!!!


-
Pete Diggs
- Site Supporter
- Reactions:
- Posts: 52
- Joined: Wed Feb 17, 2010 12:04 am
- Bike owned: NC35, Monster S4R, MG 850T
- Location: Sacramento, Ca
- Contact:
 Re: I’m an RVF Owner. This is my Story (Warning – LONG)
Hello Everyone,
I apologize for my absence this past year, but 2014 is looking to be a good one where I may have my RVF running again.
A quick update. I ended up being laid off at the end of 2012 which forced me to put the project on hold and move to the US East Coast. While conducting my job search, I worked with my family's business in order to maintain some income.
However, while being back in Florida, I was still able get back to California to perform work on my bike.
In mid 2012, I purchased some Tyga parts and carbon fiber fairings since I was unable to procure OEM fairings. My reasoning for purchaing them was, if I can't get it back to original, then I must upgrade the quality. In January of 2013, I traveled to Mike Norman's G-Force shop and attempted to fit some of the parts.

I then took it to Walt the Frame Man in Sacramento, where they optimized the frame and straightened all the integral parts. The bike was returned in a bare bones state

My focus on the bike now has been to put it back together again and fix the last remaining bits.
The three main issues I've seen have been the following:
1. Put the wire loom in the correct place
2. Remove the pebbles caught in the radiator as well as giving it a flush and clean.
3. Purchase a new fuel petcock.
The petcock issue was interesting since the lever seemed jammed. At Larry's Busy Little Shop we were able to tap it and get a look on the inside. We saw that the O-rings had become rotted. We figured that we could find the proper O-rings and cap the head, but I didn't want to hassle with calling a bunch of places to find a needle in a haystack.
Pics below.


-
Pete Diggs
- Site Supporter
- Reactions:
- Posts: 52
- Joined: Wed Feb 17, 2010 12:04 am
- Bike owned: NC35, Monster S4R, MG 850T
- Location: Sacramento, Ca
- Contact:
Re: I’m an RVF Owner. This is my Story (Warning – LONG)
Also, I will most likely ask this in another forum as well, but are there directions on who to route the wire loom on the bike? The Haynes Manual doesn't really have a step by step process
-
Cammo
- Site Supporter
- Reactions:
- Posts: 4505
- Joined: Thu May 01, 2008 12:35 am
- Bike owned: NC30
- Location: Melbourne, Australia
Re: I’m an RVF Owner. This is my Story (Warning – LONG)
There's a copy of the [UK] NC30 service manual in the downloads area: http://www.400greybike.com/docs.htm
Section 1 covers the wiring layout, the route is very similar for vfr and rvf.
Section 1 covers the wiring layout, the route is very similar for vfr and rvf.
"It's just a ride" Bill Hicks
-
Pete Diggs
- Site Supporter
- Reactions:
- Posts: 52
- Joined: Wed Feb 17, 2010 12:04 am
- Bike owned: NC35, Monster S4R, MG 850T
- Location: Sacramento, Ca
- Contact:
Re: I’m an RVF Owner. This is my Story (Warning – LONG)
Thank you for the info Cammo! I'll print this out
-
Pete Diggs
- Site Supporter
- Reactions:
- Posts: 52
- Joined: Wed Feb 17, 2010 12:04 am
- Bike owned: NC35, Monster S4R, MG 850T
- Location: Sacramento, Ca
- Contact:
Re: I’m an RVF Owner. This is my Story (Warning – LONG)
Well I finally got to see my bike today, and like always there's always something.
When attempting to put the wiring harness back properly, we needed to unscrew where the subframe attaches to the frame. As we were doing this we could tell it was binding and stripping the thread. Apparently, something went wrong. Either someone screwed it in improperly or the materials binded together somehow.
The good thing there's some thread left and I will be purchasing a 30mm or longer 10 1.25, so we can attach a nut to the other side.

I also noticed someone had cut one side of the plastic undertray, where it attaches to the frame.

Missing Piece

I gotta say. This bike has been through too much abuse by mechanics that are lazy and previous owner(s) that didn't care.
I feel that this has been a nightmare but I will push on. I'm in far too deep now.
-
Pete Diggs
- Site Supporter
- Reactions:
- Posts: 52
- Joined: Wed Feb 17, 2010 12:04 am
- Bike owned: NC35, Monster S4R, MG 850T
- Location: Sacramento, Ca
- Contact:
Re: I’m an RVF Owner. This is my Story (Warning – LONG)
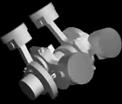
Now I have to make sense of these pieces since I got it back from the frame guys.
Anyone have any ideas what these are by chance?

Also tomorrow I ring in my banged up radiators to be cleaned and flushed. Wish me luck!


Anyone have any ideas what these are by chance?

Also tomorrow I ring in my banged up radiators to be cleaned and flushed. Wish me luck!


-
Pete Diggs
- Site Supporter
- Reactions:
- Posts: 52
- Joined: Wed Feb 17, 2010 12:04 am
- Bike owned: NC35, Monster S4R, MG 850T
- Location: Sacramento, Ca
- Contact:
Re: I’m an RVF Owner. This is my Story (Warning – LONG)
By the way...thanks Cammo. The diagram worked
-
NGneer

- Site Supporter
- Reactions:
- Posts: 794
- Joined: Wed Jan 21, 2009 7:37 am
- Bike owned: x3 NC30,Matchless G80s AJS16ms
- Location: Köln
Re: I’m an RVF Owner. This is my Story (Warning – LONG)
Top left I reckon is the cable guide thingy that fastens to the front L/H side of the top yoke, like so..Pete Diggs wrote:Now I have to make sense of these pieces since I got it back from the frame guys.
Anyone have any ideas what these are by chance?

The two on the top right I think are the lower fairing supports that fasten between the fairing and the frame at the rear. These ones.

No idea on the others
Last edited by NGneer on Fri Jan 17, 2014 9:16 am, edited 2 times in total.
-
Drunkn Munky

- Site Supporter
- Reactions:
- Posts: 6313
- Joined: Thu May 01, 2008 9:37 am
- Bike owned: NC30 MC21 TZR FZR GSXR RG MITO
- Location: Kent
Re: I’m an RVF Owner. This is my Story (Warning – LONG)
2nd frm the right is a top rad bracket, the other 4 are front fender brackets for the brake lines